Many of my cards here use the Magnolias For Her set from Altenew and sentiments from various sets from them as well. So let's get looking and hopefully you'll be inspired to start work on your Mother's Day cards!
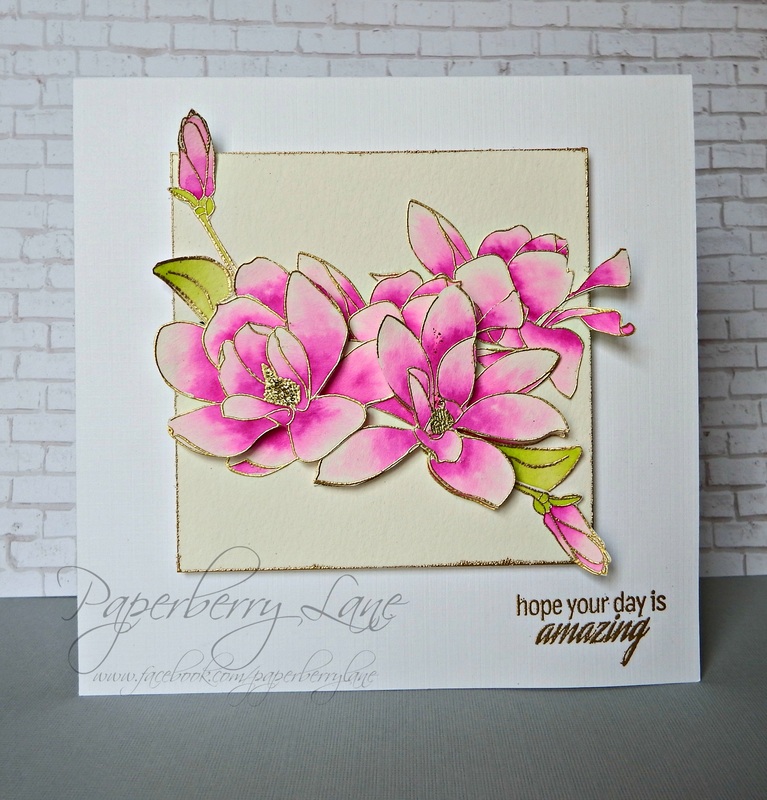
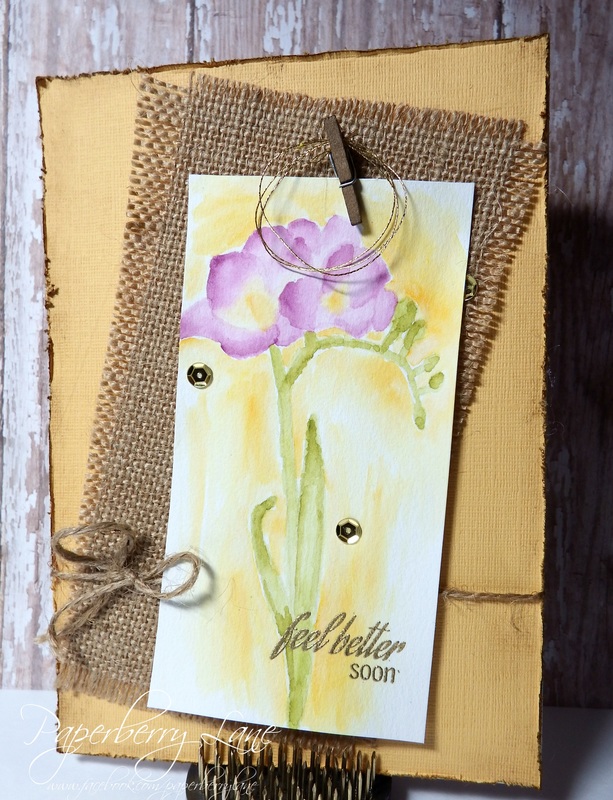
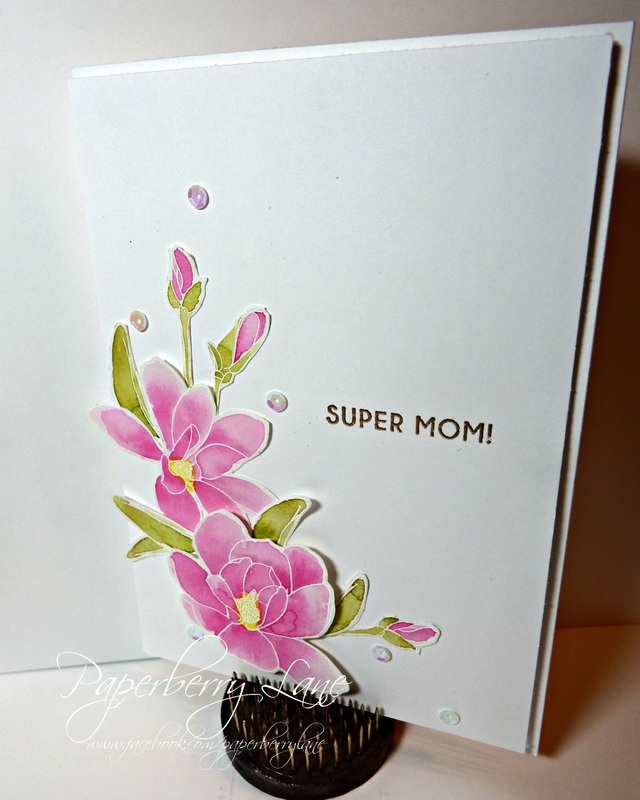
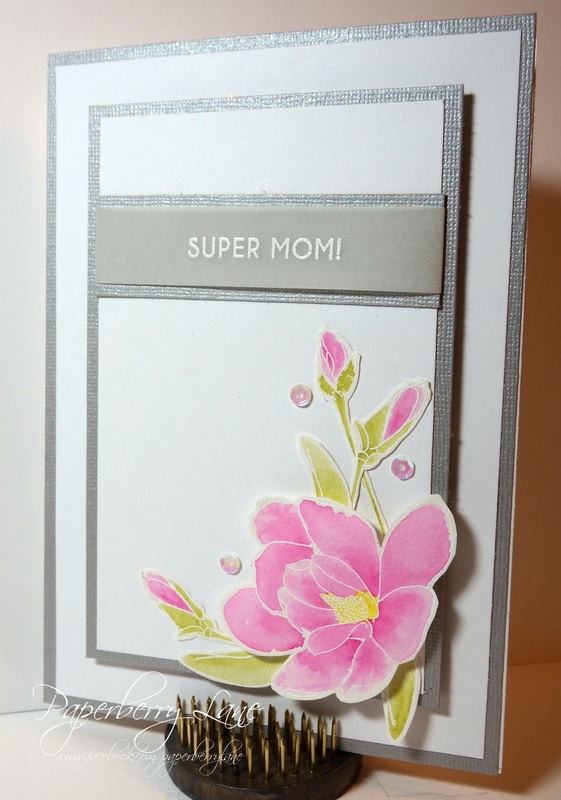
I've been hard at work on cards for the upcoming Mother's Day holiday. It's actually one of my favorite holidays to create for. It allows me to be extra girly, play with soft color palettes, and vibrant spring colors. This year fuchsia and magnolias seem to be my color and design of choice. I've recently become addicted to Altenew Stamps and can't get enough of them. They are great outline stamps...which are excellent for coloring and personalizing. Many of my cards here use the Magnolias For Her set from Altenew and sentiments from various sets from them as well. So let's get looking and hopefully you'll be inspired to start work on your Mother's Day cards! 
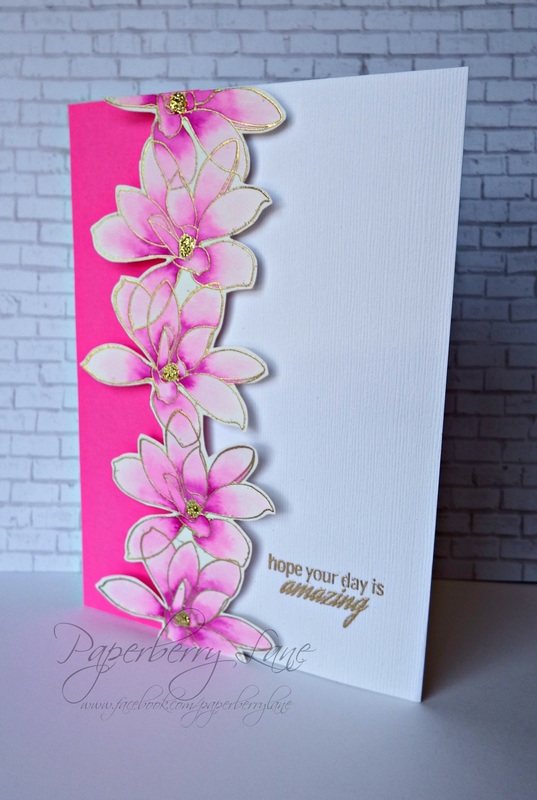
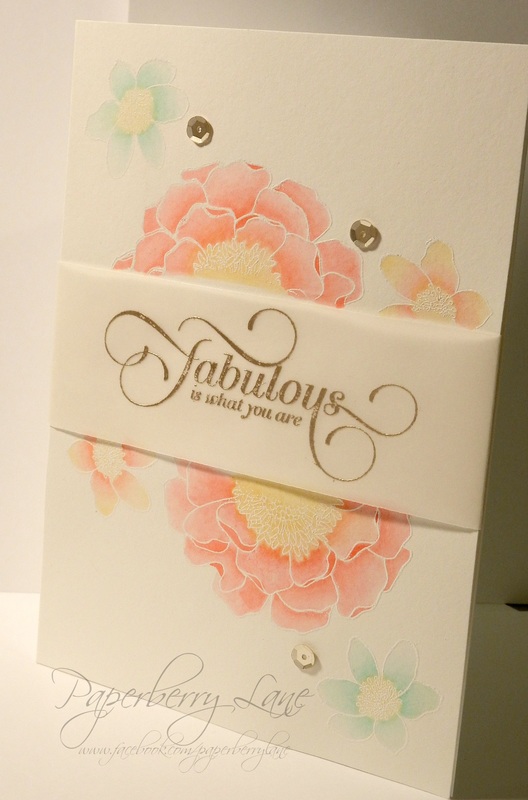
This card was made using one of the magnolia stamps from the Magnolia For Her set and the sentiment from Freesia set, as well. I love the vibrant fuchsia from the cardstock that matches the magnolias. The flowers were embossed in gold (as well as the sentiment) and water colored using Dylusions ink in Funky Fuchsia. I love using this ink for water color. The colors are vibrant, fun and richly pigmented.
0 Comments
Do you ever make a piece that you are so incredibly proud of? This is one of those pieces for me! I absolutely love this set by Altenew called Magnolias For Her and I find myself using it quite a bit! Don't worry...if you don't have this particular set, any outlined floral will work great for this card.
As much of a beauty as this card is, I do have to warn you that this isn't a card that you can throw together in a short amount of time so be sure to set aside some time when you sit down to work on these. That being said; it isn't hard..it's just has several parts and pieces and can be labor intensive. But look at it! I think it's worth every minute spent! Let's get started! To those of you celebrating today; I wanted to wish you a Happy Easter! Take time today to spend with your loved ones and do what you love. Myself, I will be spending part of my day with family and the remainder working on new designs and finishing up what is starting to become a very drawn out bedroom redo.
It seems like all home projects start out so simple then snowball into something out of control quickly. I love being a crafter but sometimes the mentality of "Why should I buy wall decor when I can make it?" gets way too far out of hand. Oh well...I'll never learn so I may as well finish up! :) How about anyone else? Does anyone else have any stories of when your crafting got the best of you? Well, enjoy the holiday and have a great day everyone! I hope to have some new projects up very soon. Happy Easter! I just realized that it's been a while since I've posted on here. Although I do update the Paperberry Lane Facebook page usually several times a week so if you haven't "Liked" the Lane on Facebook, be sure to do that ASAP so you don't miss out on any exciting new projects! Anyway...I wanted to share some new water coloring that I've done with some new, fantastic stamps from Altenew! I'm not affiliated with anyone, I just really love their stamps! I recently purchased the Fresh Freesia and Magnolias for Her and I couldn't be anymore happy them! Here are some pictures of recent cards I've made! With spring right around the corner, I've been busy brainstorming for Mother's Day ( I have a show about 2 weeks before then) and Easter that is in only a month. What occasions are you working on right now? Head over and post some on the Facebook page and let us see what you're working on! Thanks for stopping by! This is a no-line water color using the Fresh Freesia stamp and the sentiment from the Magnolias For Her set: This one is also the Fresh Freesia stamp and sentiment: It wouldn't be too fair if I didn't give some love to the Magnolias For Her set! Flowers are stamped and heat embossed then water colored with distress inks from Ranger: Again, here is the Magnolias For Her. I've also stamped and heat embossed them and water colored them with Ranger distress ink: Thanks again for stopping by..and remember that sharing is caring...spread the Paperberry Lane love to some of your crafty friends!
It's a new year so it's definitely time for a new tutorial, right?! I hope that the new year is fabulous so far. And speaking of fabulous... I was so overwhelmed by the amount of love for this card and the request for how it's done that I went ahead and created a tutorial for it! Last year I struggled to get out of Christmas crafting-mode and back into "regular" crafting but this year seems to be an exception. I am love the colors and the combo with these great flowers. I'm going to stop rambling on now and get to the nitty-gritty!
I am not your true love but you may fall in love with this last card! I know I am in love with how it turned out. This card is a great card to give to someone close to you! The base of this 3D card is water colored in an ombre blue leading up to an explosion of snowflakes! This card can be made using any card-in-a-box template or tutorial. The only change would be to use water color paper instead of cardstock if you wish to create the water color effect. The snowflakes are mainly die cuts and the smaller are punched. This card takes a little bit of patience and it's not one I would recommend to make a lot of but would be great for those nearest and dearest to you or even as a great hostess gift.
Now that the countdown is done, be sure to keep your eye on Paperberry Lane's Facebook page for details on my give away! It's the second to last day of Christmas and I have a card with unusual colors to get you motivated to get those cards made! This card was pretty much inspired by the picture that was on the stamp set. I changed the colors a bit and added some washi tape just for fun. There are so many things to do with this set that I plan on using it a lot in the future and not just for Christmas cards. These crystals make great decorations for birthday cards, etc. It was hard to capture this card in just one picture. I embossed the ornaments in gold and water colored them using distress inks-of course! :) I added a bit of dimension by adhering the middle ornament with dimensional dots. The sentiment is also embossed in gold as well as the stars. Only a bit of embellishments are needed with a few sequins and some matching washi tape.
Don't forget to stop by tomorrow for the final card in the countdown and to find out how to get in a drawing! But you have to "Like" Paperberry Lane on Facebook to catch it all!See y'all then! I think they hustle and bustle of the holidays must be getting to me already because I was just too exhausted to even get this blog posted! But without further ado...here is my miniature peppermint card. This card only measures 3" x 3" and is a good example of what you can do with one little stamp and just a few minutes of time. Who doesn't have a couple of small random stamps hanging around? I loved this peppermint but never really knew what to do with it. I decided to make a small card that could be included in a gift bag or even attached to a gift as a tag. If I hadn't have had to wait for drying time on the Glossy Accents; this card would have only taken about 10 minutes to put together.
I did stamp the peppermints in distress ink and put a little bit of shading in the white areas to make them appear more realistic. But a very easy card to create. And because this card wasn't posted until today...be sure to check back later for today's card in my countdown! Only one more card after today! And make sure you "Like" Paperberry Lane on Facebook! See y'all soon! With only three more days left after today, I wanted to include a card that could be considered "masculine" even though it would be a great card for anyone. Masculine cards seem to be the biggest challenge among card makers. Let's face it...there isn't a whole lot of selection and we are all used to making cards with bows, bling and glitter that sometimes these cards can be tricky to come up with. As soon as I seen this card, I knew it would be great for a man's Christmas card. Personally, I would love to get it as well! This card was stamped with StazOn ink on water color paper and colored with a water brush and distress inks. There's a previous tutorial from a few months ago if you're looking for the technique. Also I used some Glossy Accents on the windshield and headlights to give them the appearance of shiny glass. I finished the card by heat embossing the sentiment in gold. Pretty straightforward and I hope you give it a try!
Don't forget to check back tomorrow for the 10th card in the 12 day countdown as well as detail about an upcoming contest! The only way to stay informed of contests and new blogs is to "Like" Paperberry Lane on Facebook! See y'all back tomorrow! Today's card is simple but elegant. This is one of those types of cards that you can do year after year and it will never go out of style...and it doesn't hurt that it has snowflakes either! :) To get this look, you really only need a sentiment stamp, at least two different snowflake stamps, some gold mirror cardstock, supplies to do heat embossing and a few sticky-back rhinestones.
The hardest part of it all is seeing all of it stamped invisibly in the Versamark while you work out placement of the next stamp. I started by stamping the sentiment first then the biggest snowflake and worked it that way. Sort of biggest to smallest. After everything was stamped, I heat with my heat tool, layered it on the gold mirror cardstock and added a few rhinestones and that's it! This design would work for almost any color, too. This would be great in red, silver, green..pretty much anything! I hope this card gets you inspired! Don't forget to "like" Paperberry Lane on Facebook and invite some friends to like it as well so no one misses out on any projects or tutorials. I have a great tutorial planned after the countdown is done! Have a great night y'all! |
AuthorHello, my name is Melissa and it is my passion to share new ideas, give inspiration, and connect other who share the same passion for papercrafting! Archives
August 2015
Categories |