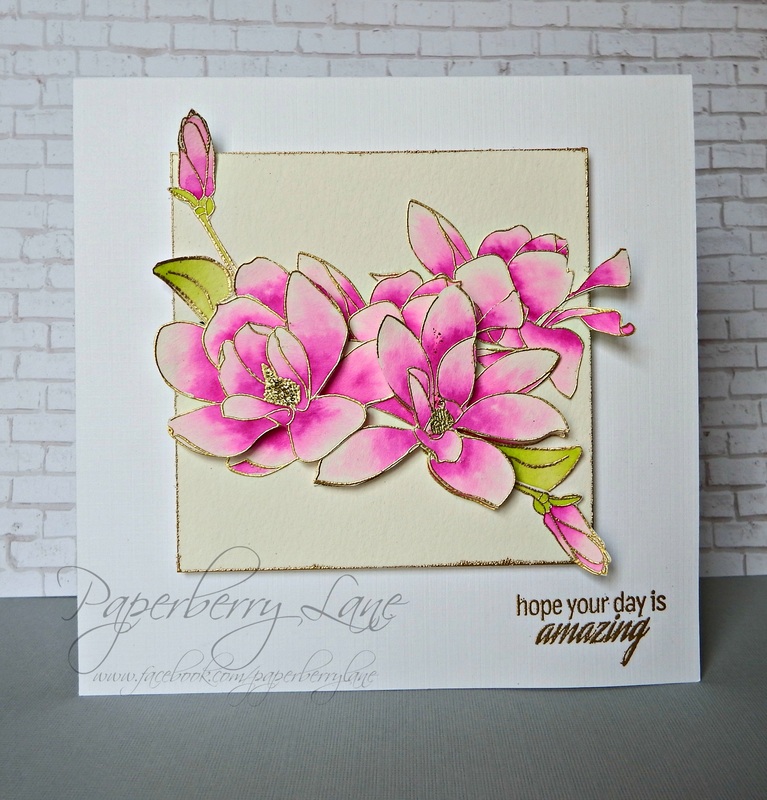
Do you ever make a piece that you are so incredibly proud of? This is one of those pieces for me! I absolutely love this set by Altenew called Magnolias For Her and I find myself using it quite a bit! Don't worry...if you don't have this particular set, any outlined floral will work great for this card.
As much of a beauty as this card is, I do have to warn you that this isn't a card that you can throw together in a short amount of time so be sure to set aside some time when you sit down to work on these. That being said; it isn't hard..it's just has several parts and pieces and can be labor intensive. But look at it! I think it's worth every minute spent! Let's get started!
As much of a beauty as this card is, I do have to warn you that this isn't a card that you can throw together in a short amount of time so be sure to set aside some time when you sit down to work on these. That being said; it isn't hard..it's just has several parts and pieces and can be labor intensive. But look at it! I think it's worth every minute spent! Let's get started!
These are just a few of the basics you need to pull of this look:
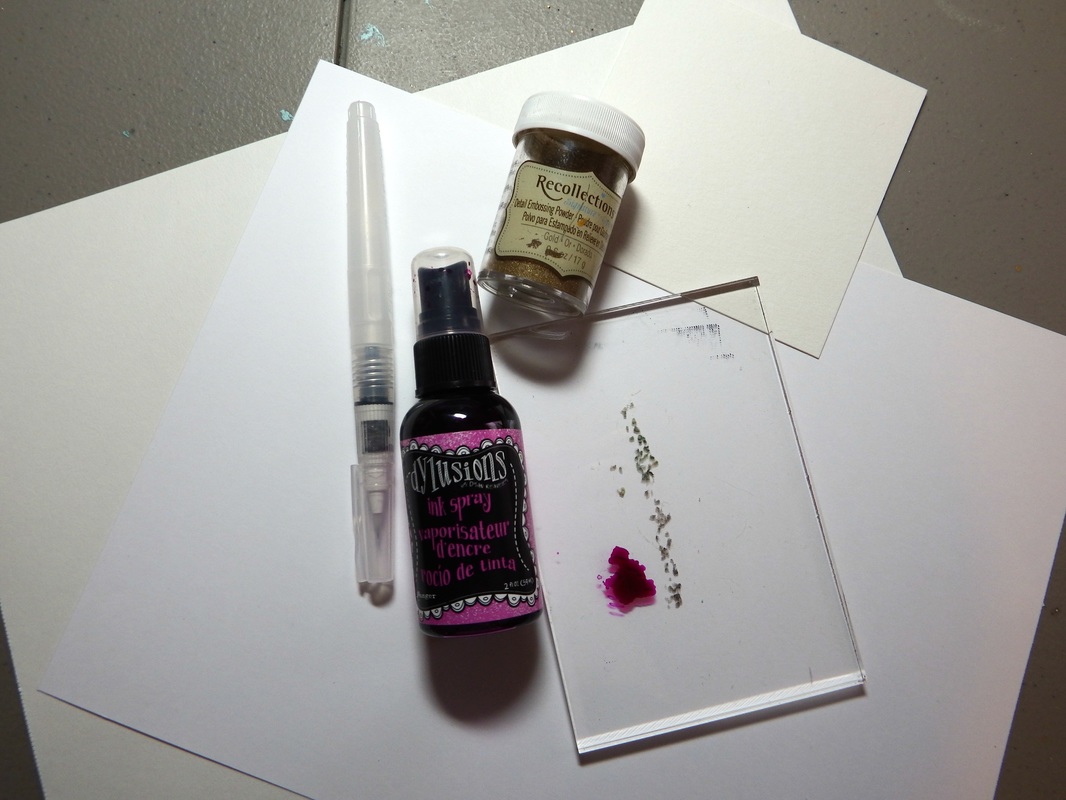
1. Gold embossing powder
2. Stamp of choice
3. Versamark (or embossing ink of choice).
4. Waterbrush or paint brush...either works great.
5. Water color paper. This is a MUST. I use a lighter weight paper for the items I will cut out (flowers) and I use a heavier weight (140 lb coldpress) Canson water color paper for the background.
6. White cardstock for the card base.
7. A water based coloring medium. If you want the bright,vibrant color that I have in these flowers, then you will need to use Dylusion ink. (The color I used is called Funky Fuchsia) This stuff is highly pigmented and works well for water coloring. I'm also a big fan of using distress ink for my water color. You can also use whatever water color you have on hand. No need to buy something special when you have something that works.
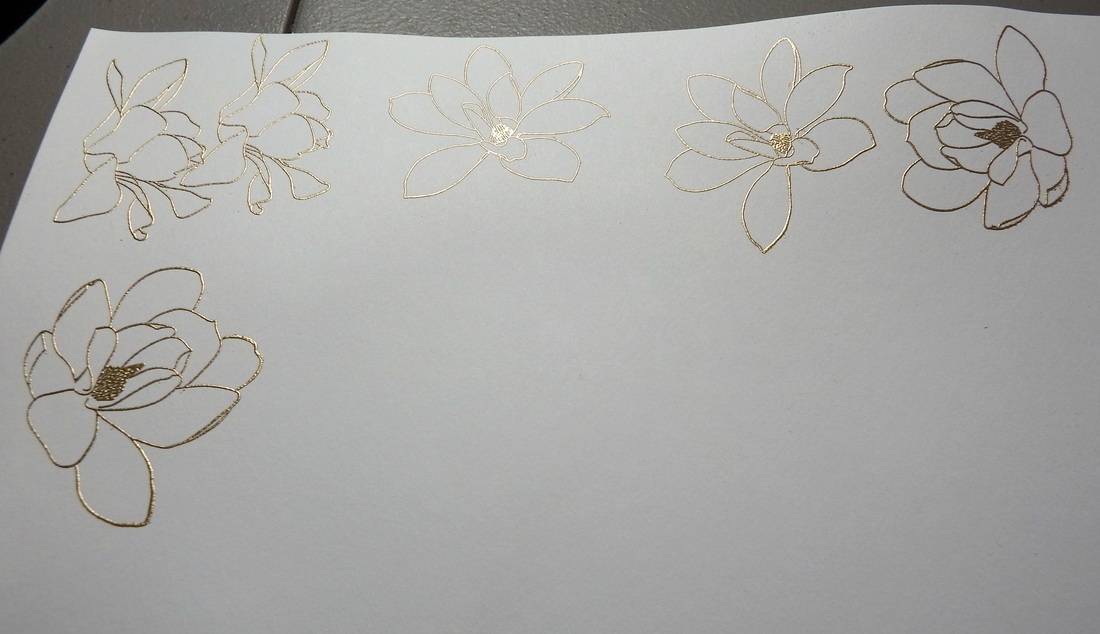
Get started by stamping your images and embossing them in gold embossing powder. You will need two of each flower so that you can layer them later on. (This is where it can get labor intensive).
To those of you who have done some of my previous water color tutorials; I must note that this is not the same type of water coloring from previous tutorials and the process does change for this technique.
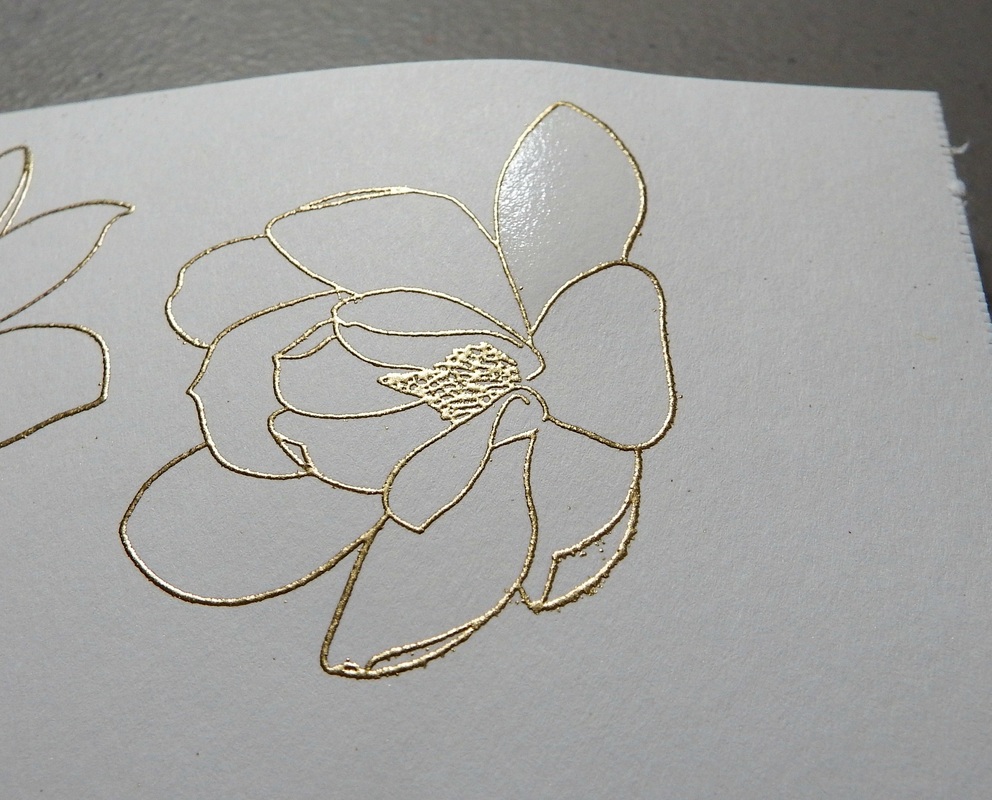
To get started, be sure to we the area with your brush that you intend on coloring. The embossing acts as a wall and will keep water and color inside each petal as long as you don't over saturate the area. You want enough water to slightly saturate the area but not enough that it starts to puddle. This is something you may have to practice until you find the amount that works the best.
To get started, be sure to we the area with your brush that you intend on coloring. The embossing acts as a wall and will keep water and color inside each petal as long as you don't over saturate the area. You want enough water to slightly saturate the area but not enough that it starts to puddle. This is something you may have to practice until you find the amount that works the best.
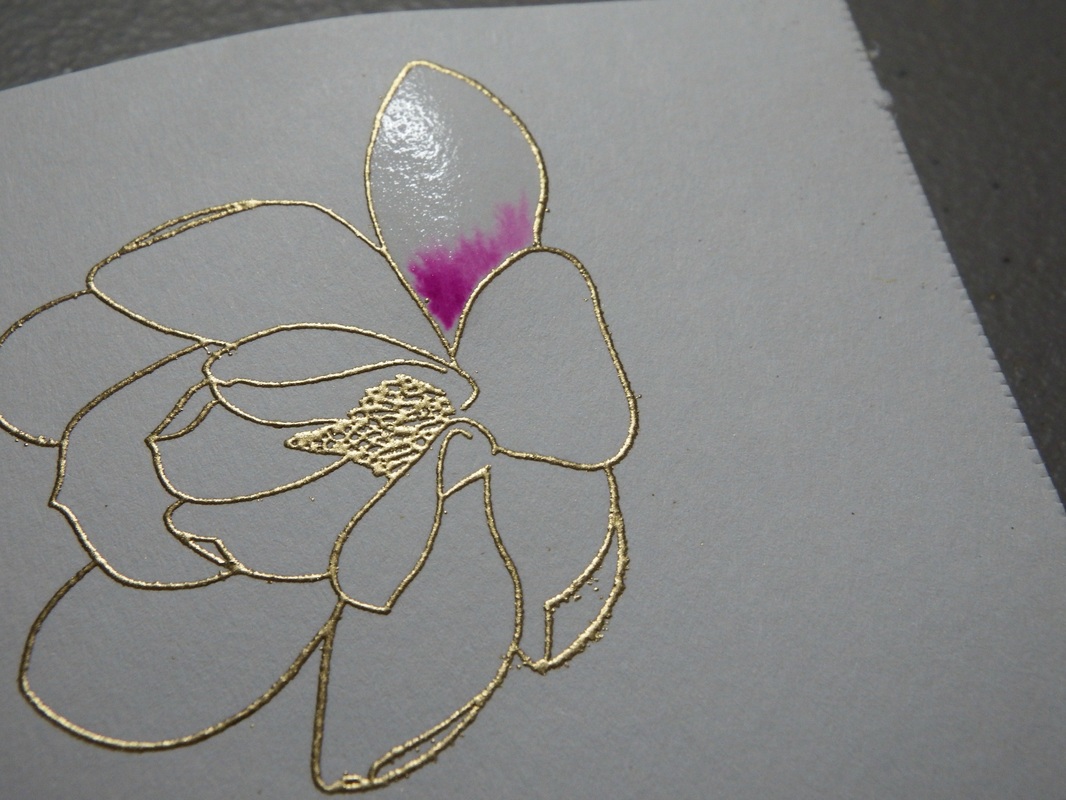
Start by picking up some of your color on the very tip of your brush. It's always much easier to come back and add more later than it is to take off color. Touch the tip of your brush to the water at the base of the petals. The water will do the work for you and fan it out.
Using your brush, blot it going towards the tip of the petal. If you have to, wipe your brush off as you go to avoid getting too much color towards the end.
Putting the color towards the base of the petal allows you to control it better and also gives you easy and natural shading!
Putting the color towards the base of the petal allows you to control it better and also gives you easy and natural shading!
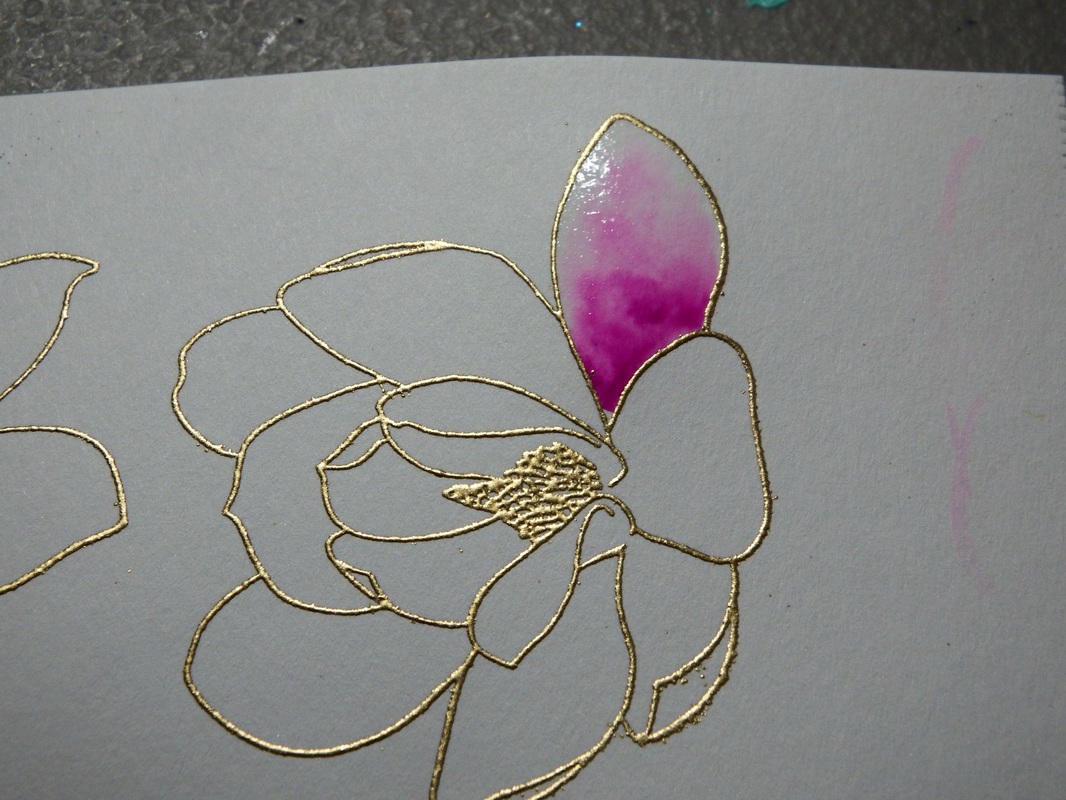
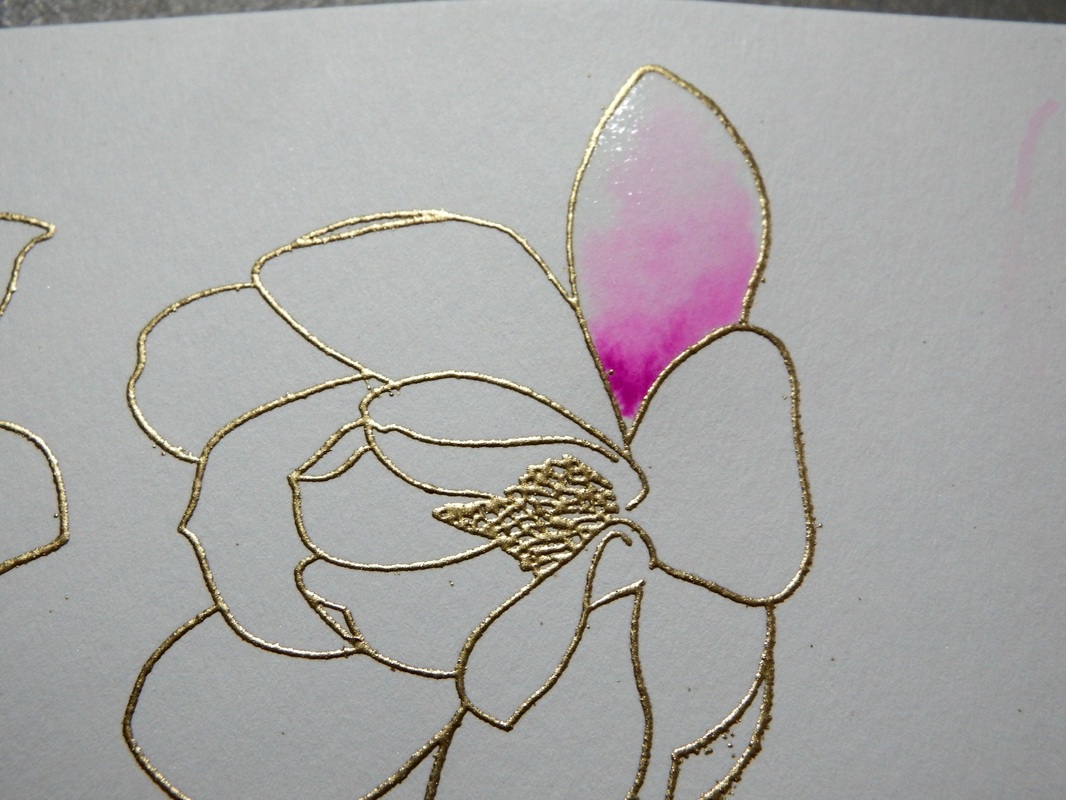
After I've moved around some of the color (by blotting with the tip of my brush) I o back and add some more color to the base to give it a more vibrant color and more contrast to the shading.
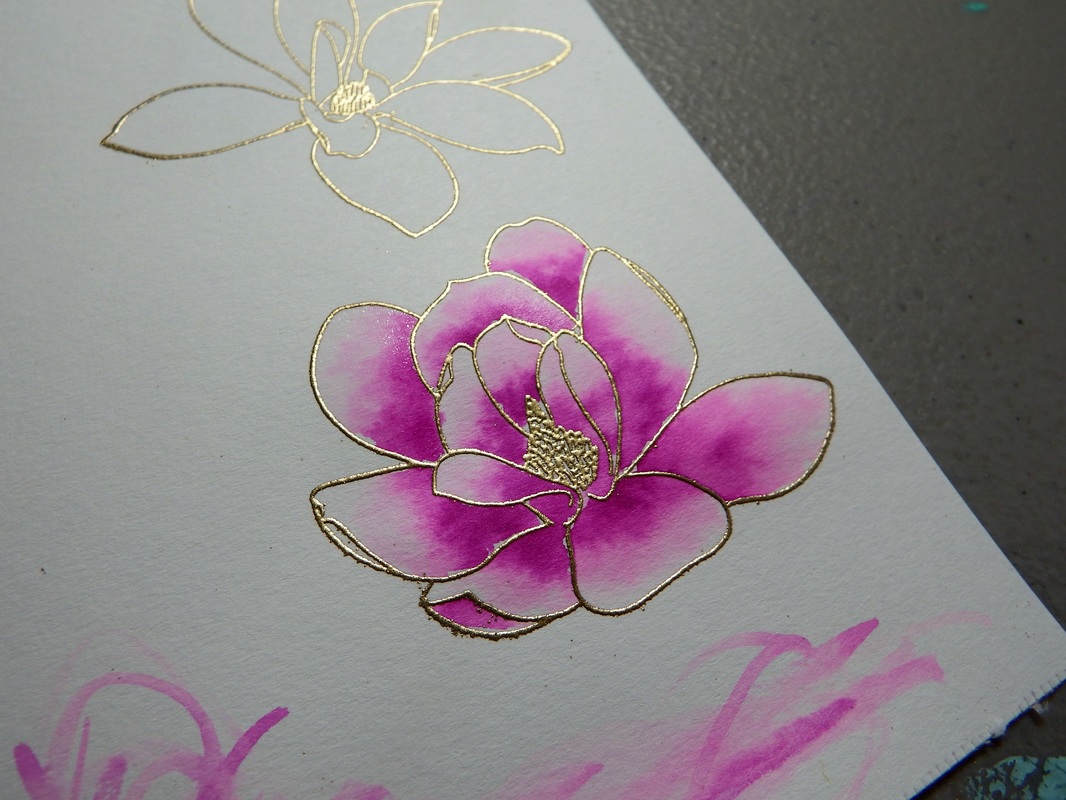
Continue to color the rest of your petals exactly as you have done. Yes, it is time consuming but ain't she purdy! Before you know it, you have one lovely flower.
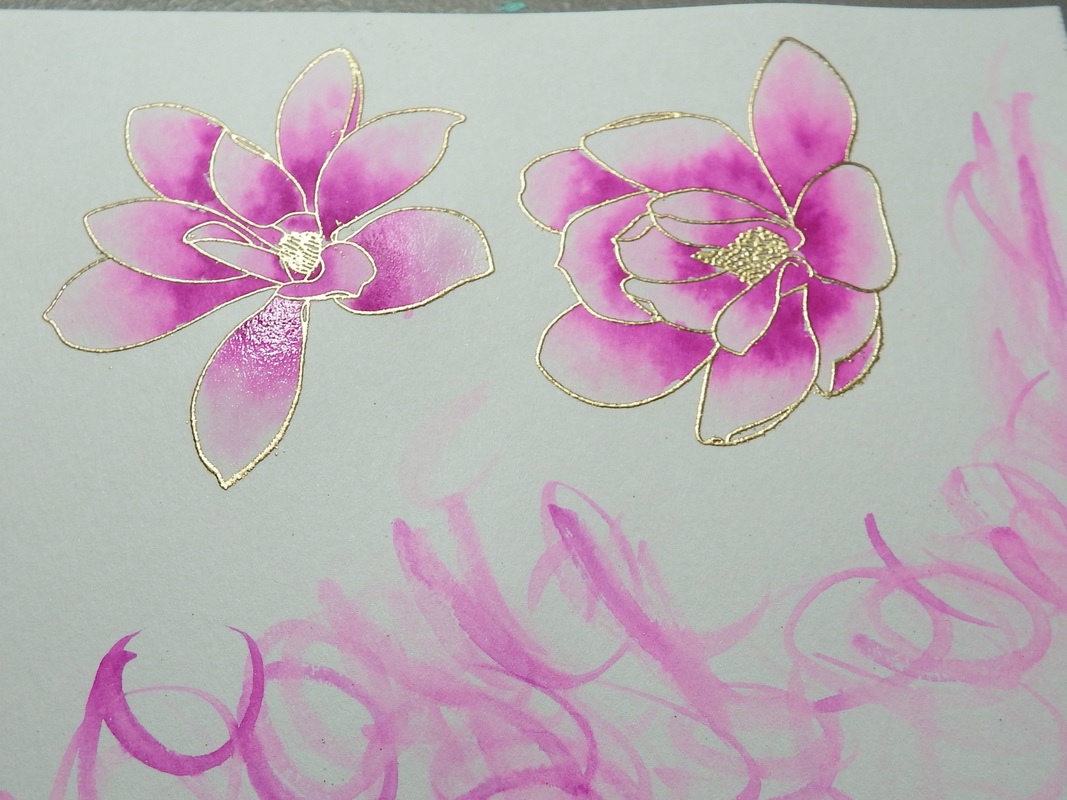
And before you know it, you have two purdy flowers!
Also, not how many times I wipe off my brush to make sure that I don't have too much ink on it. It's always easier to add more color later!
Also, not how many times I wipe off my brush to make sure that I don't have too much ink on it. It's always easier to add more color later!
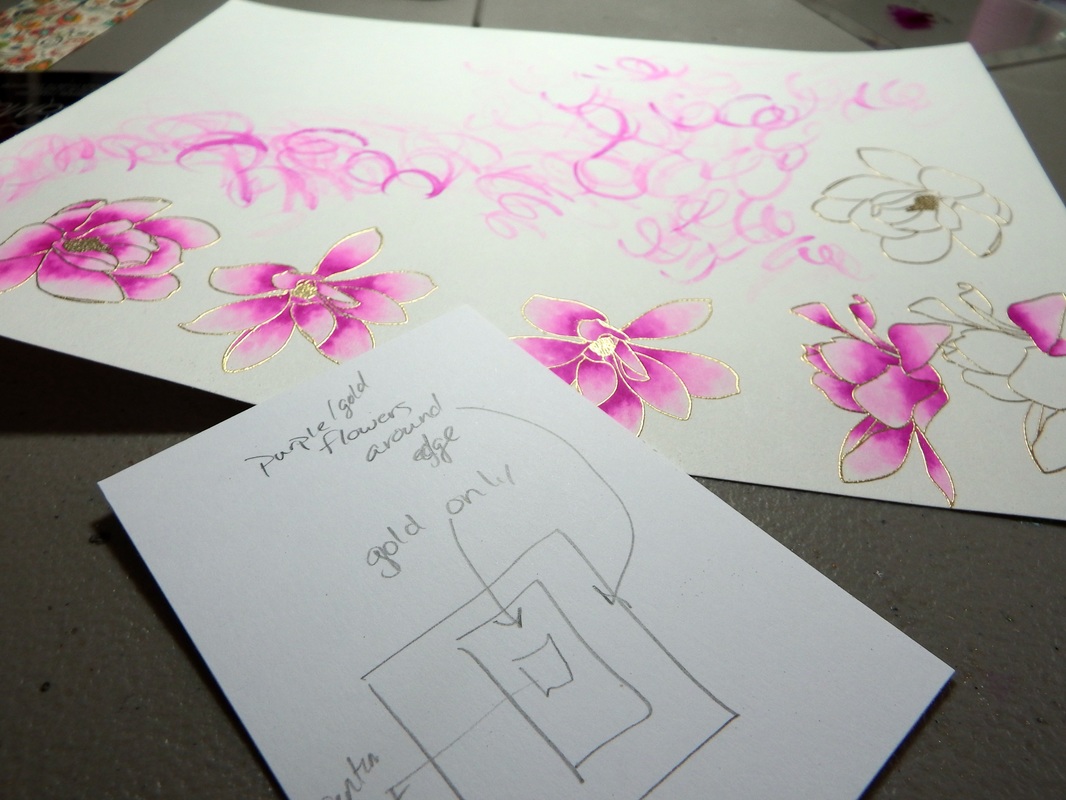
I had to take a minute to show you my mess creative process. In the middle of coloring; and idea struck me for my next card and I couldn't let it pass and forget it. What do you do when you get a good crafting idea? Do you have a place where you keep all your ideas. I try to tell myself that I'll remember it later but honestly, it's the biggest lie I tell myself. But this idea will not be getting away!
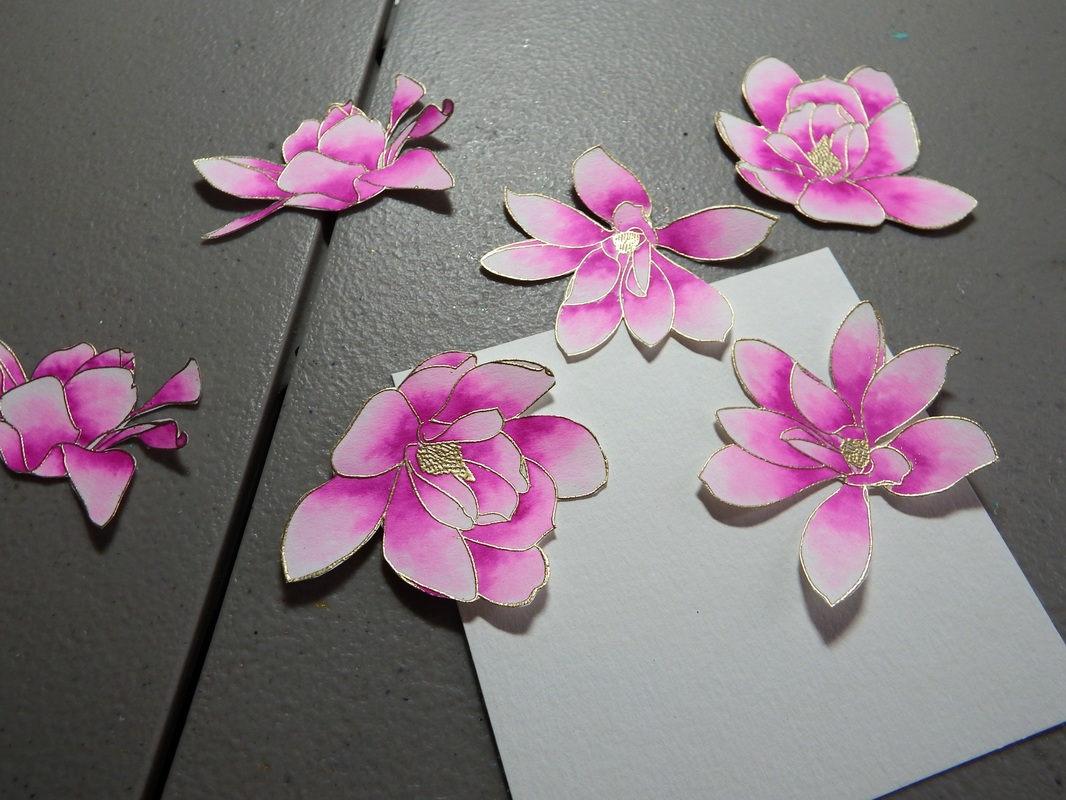
Now, cut all of your flowers out. I cut very close to the embossing, leaving as little of the white paper showing as possible. This set may come with a matching die set, but I would rather cut them out by hand and save that money for another stamp set!
To make your layered flowers, you will need to pick parts of one flower to cut away and then layer over the other adhesive dimensional foam. These two flowers were the same flower until parts of the second one were cut away to create the layer.
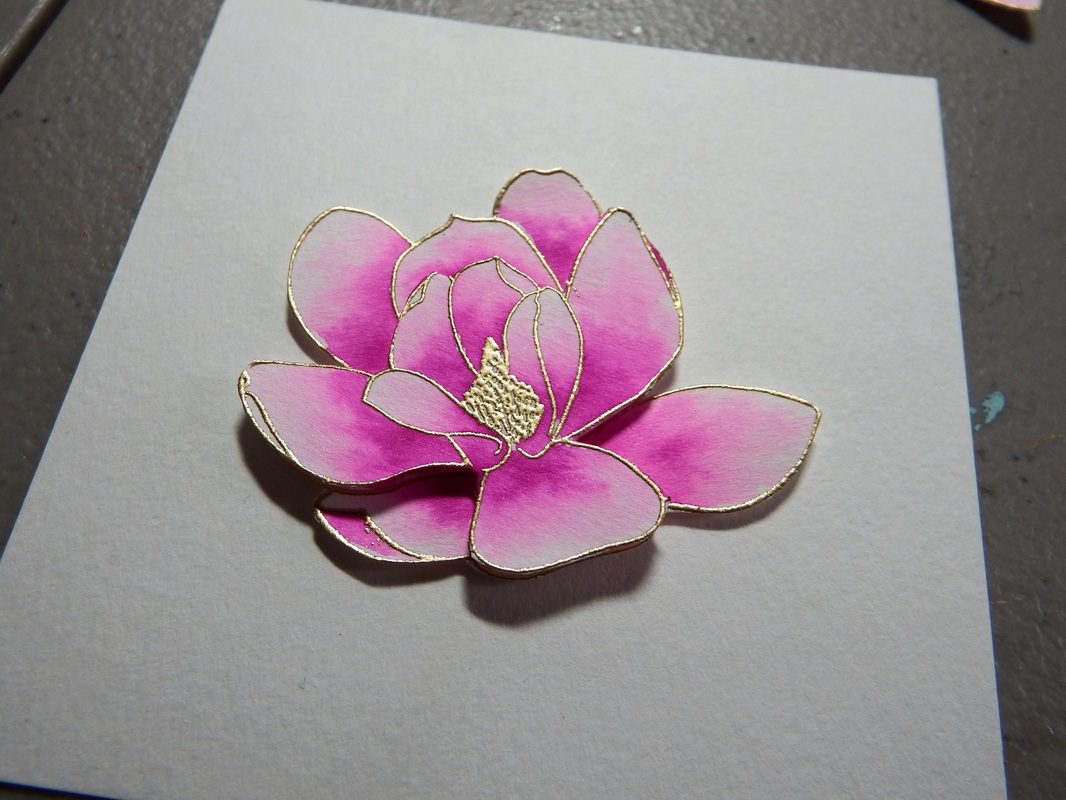
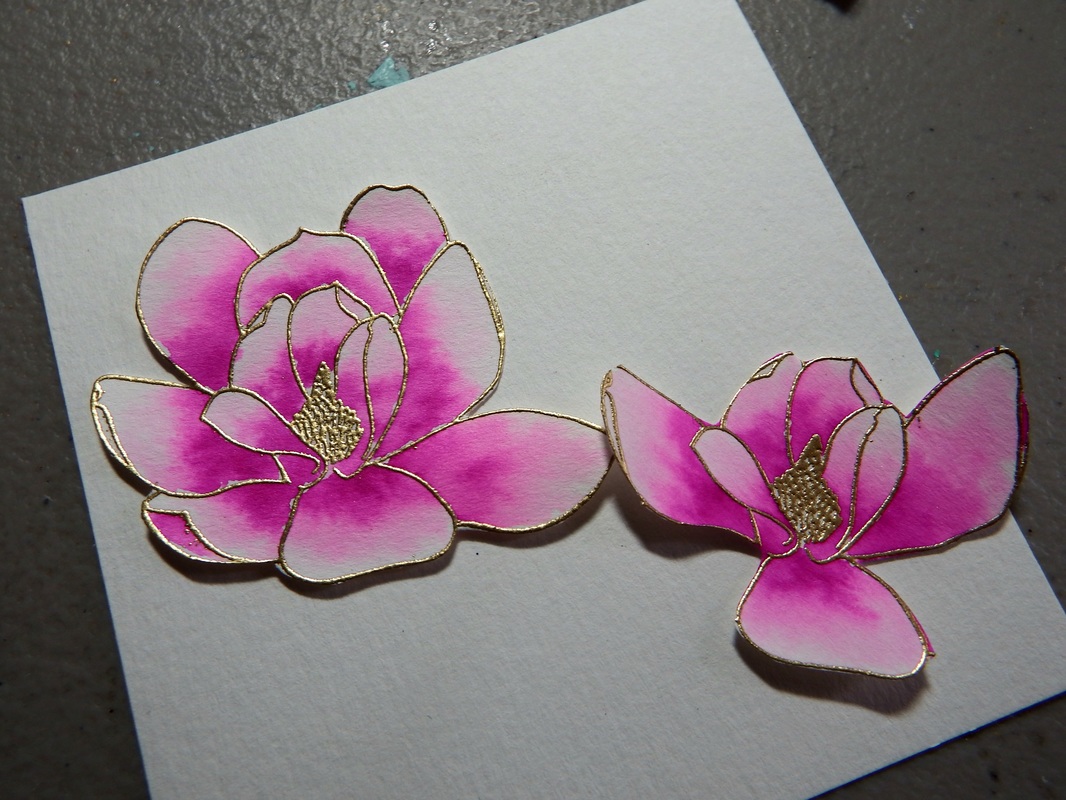
And here's the finished flower. It probably makes a bit more sense after it's layered and finished.
To create the gold edge of the card, simply run your Versamark around the edges and emboss with gold.
To create the gold edge of the card, simply run your Versamark around the edges and emboss with gold.
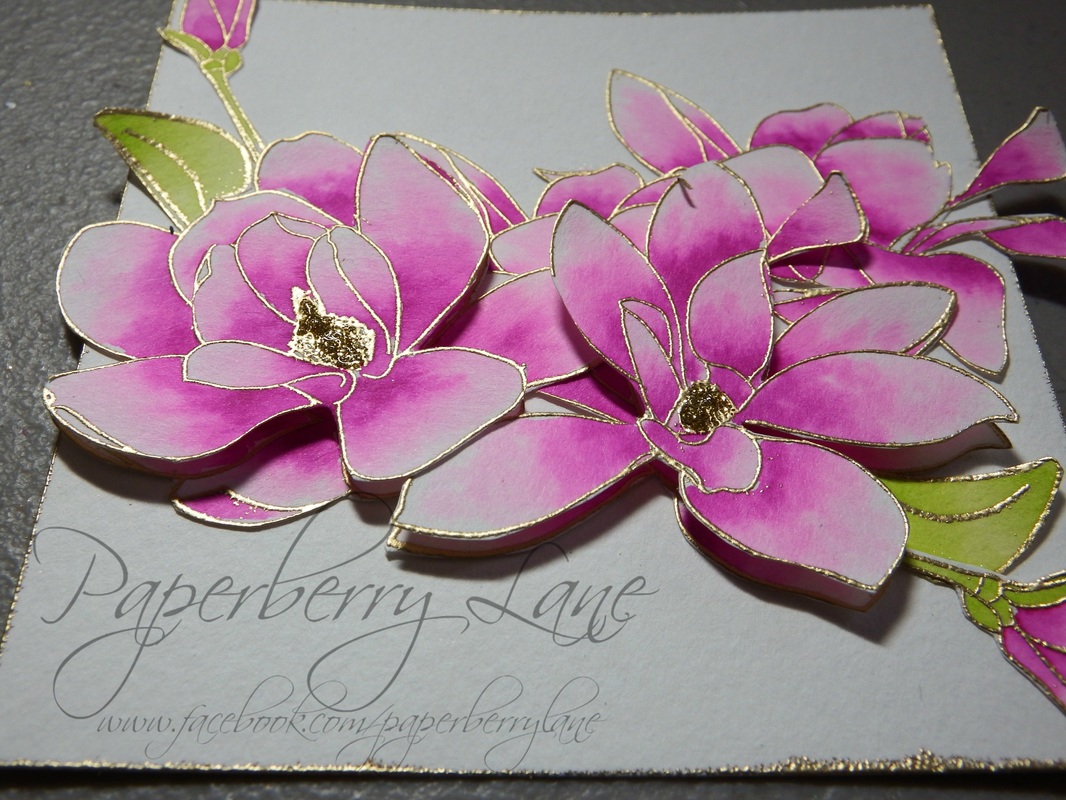
To finish your card, play around with the placement until you find something that you can live with. When I start to adhere everything, I snap a picture of the placement that I like with my phone, that way if I forget, I can just recall that!
Heat emboss your sentiment on the front of your cardstock and adhere the finished floral panel with adhesive foam.
I did say that it was slightly labor intensive but it's definitely one of those cards that is worth every bit of effort.
Thanks for stopping by and visiting! Remember that sharing is caring! If you like this post remember to share with friends and have them "Like" Paperberry Lane on Facebook to get all the latest tutorial news and great cards ideas!
Have a great evening!
 RSS Feed

