Wow! Welcome! It's been a seriously long time since I've been able to sit down and create a blog. I hope you are all following Paperberry Lane on Facebook, as I usually have more time to post my work, as opposed to full blogs. With a new promotion, kids out of school and working on custom orders, it has left little time get sit down and make and write a blog. They are more work than you may think. :)
I've made you all wait long enough so let's get right to it! This technique uses distress inks and washi tape to create neat effect to only chosen areas of your choosing. Projects like this are why I buy washi tape when it's on clearance. It doesn't matter what the design is when you are using it as a tool rather than a decorative piece. I also love to use it to tape down my dies when I put them through my Cuttlebug. This is a great and inexpensive way to keep them in place if you don't have a magnetic plate.
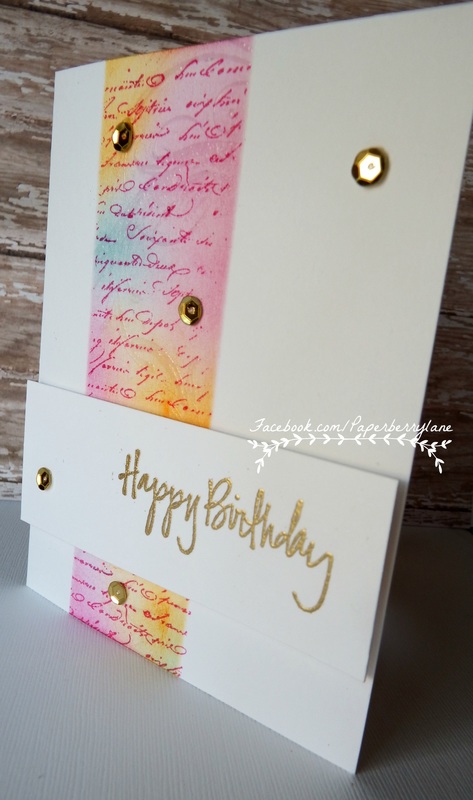
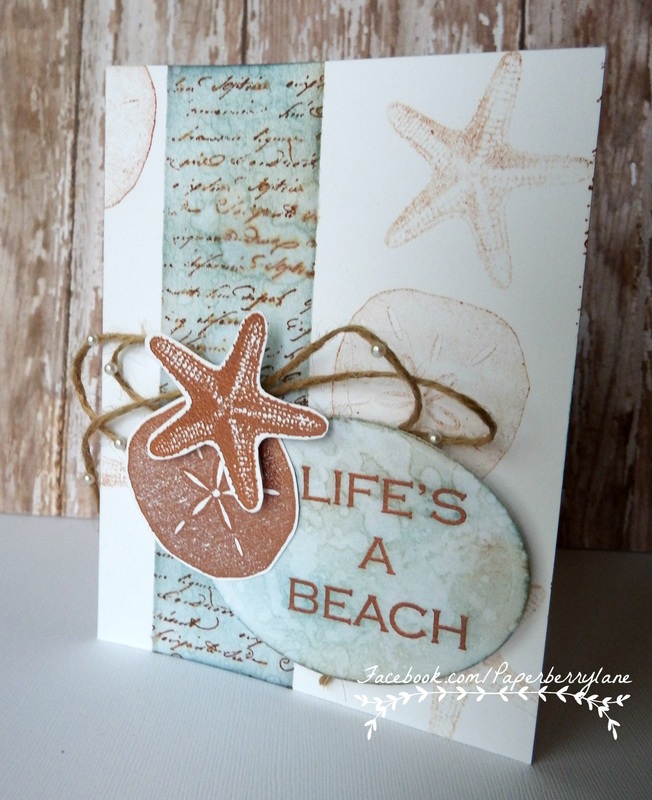
This is the beauty we will be making! But don't think this technique is limited to these colors or stamps. Be sure to check out other ideas using the same technique at the end of the tutorial.
I've made you all wait long enough so let's get right to it! This technique uses distress inks and washi tape to create neat effect to only chosen areas of your choosing. Projects like this are why I buy washi tape when it's on clearance. It doesn't matter what the design is when you are using it as a tool rather than a decorative piece. I also love to use it to tape down my dies when I put them through my Cuttlebug. This is a great and inexpensive way to keep them in place if you don't have a magnetic plate.
This is the beauty we will be making! But don't think this technique is limited to these colors or stamps. Be sure to check out other ideas using the same technique at the end of the tutorial.
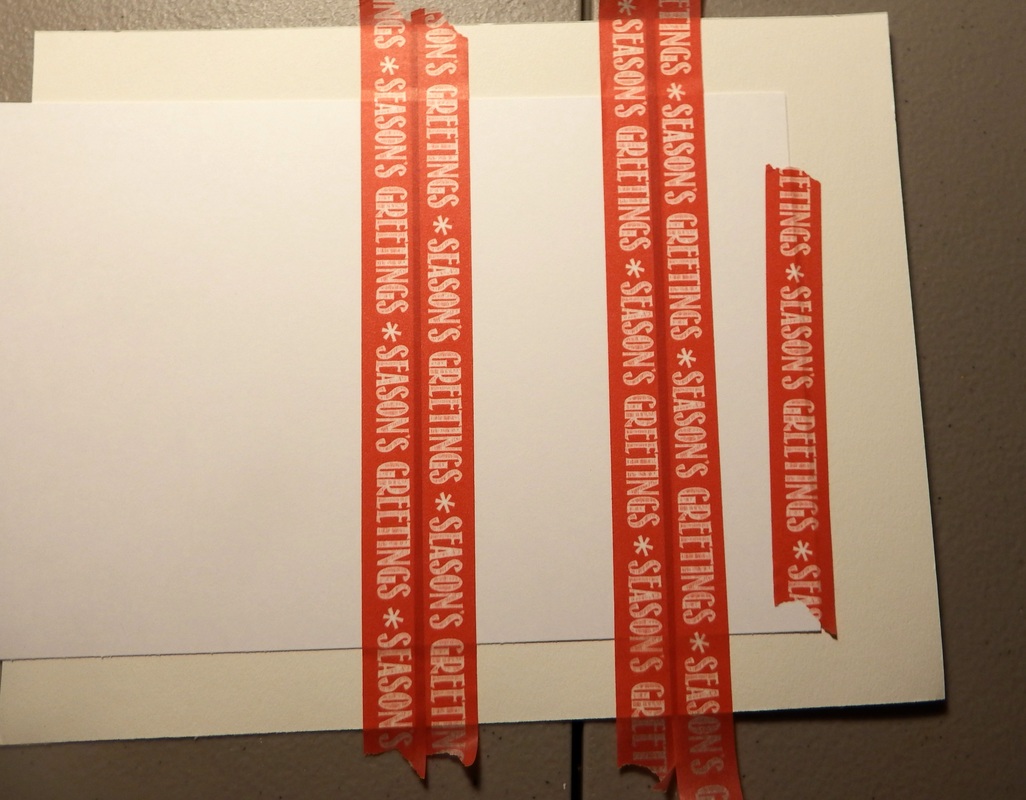
To begin, cut your cardstock to your desired size. For this particular card I used an A2 size. Using your washi tape, go ahead and tape off the section that you would like to be inked. Make sure there is enough washi tape on either sides that you won't get ink or any of your stamped background image on the white part of your card. I'm a messy crafter so I made sure I taped off a lot!
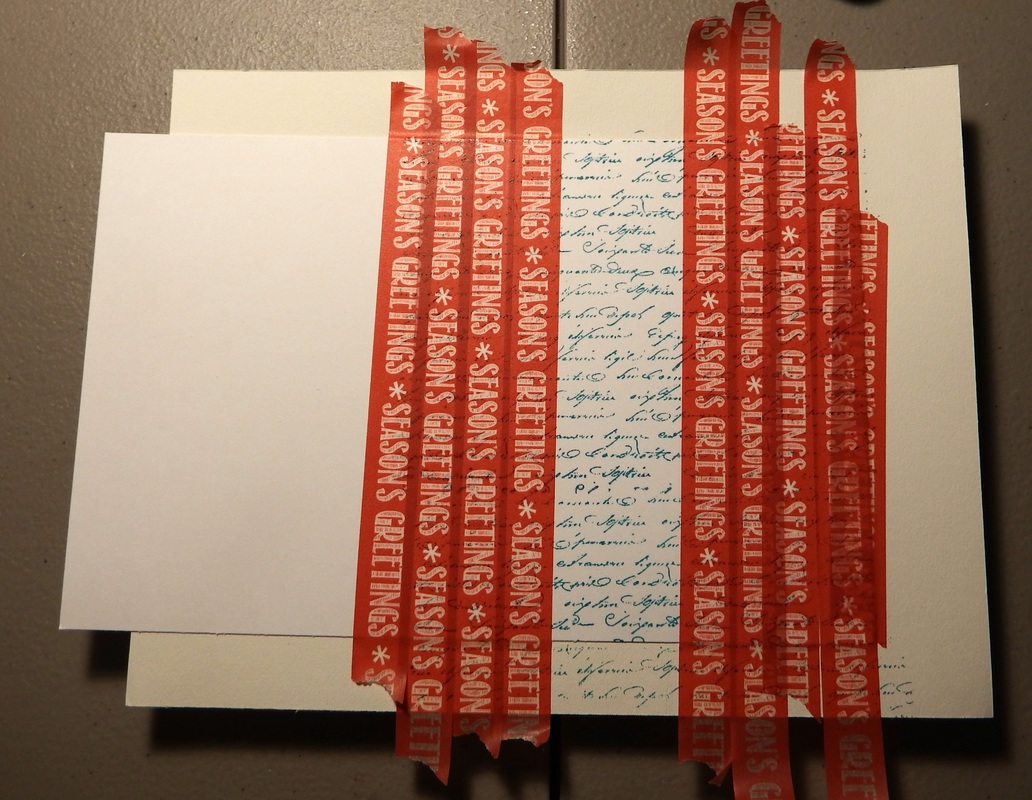
See, I told you I taped a lot. Pick out a complimentary color and go ahead and stamp your background image on to your cardstock, being careful not to stamp any white parts outside of the taped area. I used a large background stamp so I had to adjust my tape accordingly. When choosing a stamped color, be sure that it will be dark enough to be seen behind the distressing, but not so much that it takes away from the rest of the card. I went ahead and used the same blue that I distressed with as it is much darker when stamped rather than distressed with.
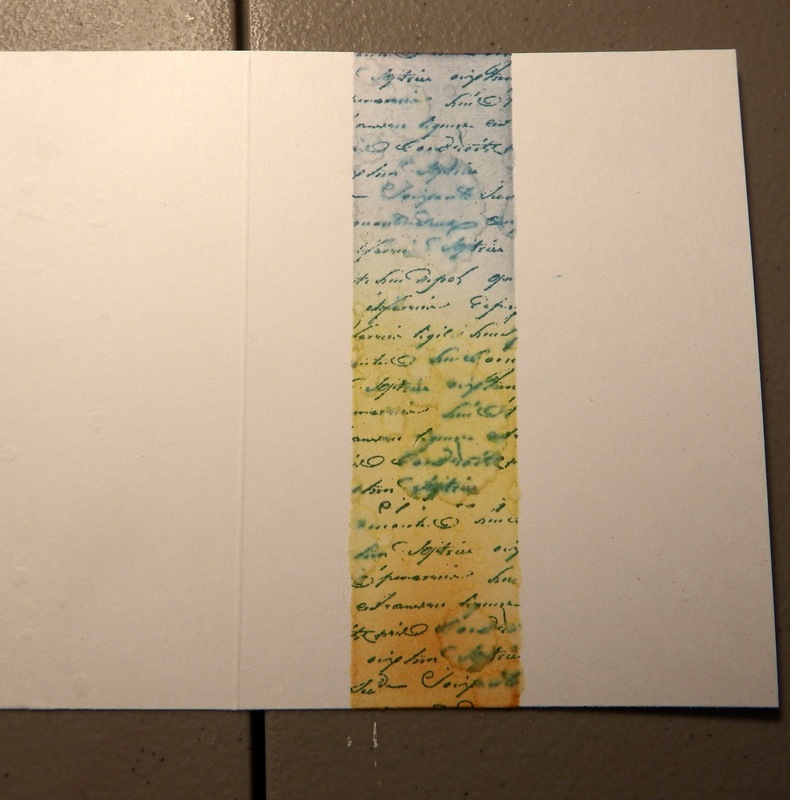
Lastly, go ahead and apply your distress ink in the colors of your choosing BEFORE you remove your tape. This technique give a great effect and works with ANY color, theme or occasion. It would be fun to add more than one stripe to a card, make them in shapes with a large multi-circle stencil. I wanna try this so bad if I can find a stencil I'm happy with!
Here are two more cards using the same technique but clearly a different theme:
Here are two more cards using the same technique but clearly a different theme:

I hope you have found this tutorial helpful! Don't forget to Like Paperberry Lane on Facebook so you can stay current on what's happening on my everyone's favorite crafting Lane!
 RSS Feed

