This card was actually my first attempt at watercolor. I found some projects similar on Pinterest and thought it would be a great starter project using watercolor. This card takes absolutely no skill, only the ability to move the brush from left to right...that's it!
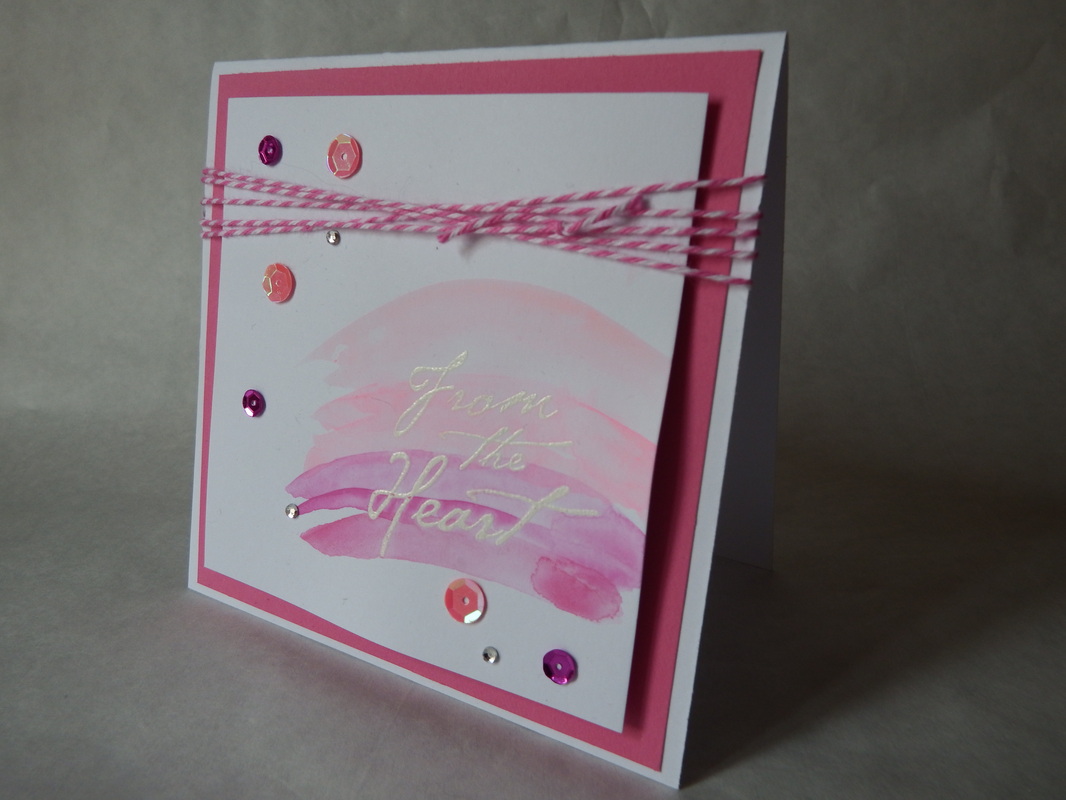
I wold like to say that this picture does this card NO justice! It's so much more vibrant in person. Oh well....
To begin, cut your card stock base to 5" x 5" or another size that may be easier for you to use. Next, mat base with a piece of coordinating cardstock that is 1/4" smaller than your base.
Cut white cardstock that is 1/4" smaller than matted cardstock. You may use regular cardstock or a SMOOTH watercolor paper. You will need to stamp and heat emboss your sentiment so the paper does need to be smooth.
Next, stamp your sentiment the the bottom right corner...ish. Doesn't have to be perfectly in that corner, just be sure there will be room on all sides to get your brush strokes in. After you've stamped, go ahead and heat emboss with white powder. The embossed sentiment will as a resist for your watercolor, allowing you to see the white emboss on the white cardstock.
Now, decide on at least three, maybe four watercolors. I chose to use gradient colors but the decisions is truly yours. Simply load up your brush with color (be generous, as you only get one shot with each stroke). I practiced several times on scrap paper before I was comfortable enough to make the final piece. Set aside and allow to dry, or speed things up with your heat embossing tool.
After your masterpiece has dried, wind coordinating twine or small ribbon around top and tie a knot. Adhere matching sequins and rhinestones in a random pattern.
Lastly, adhere to card base using foam dimensional dots.
I hope you've enjoyed all the new projects and maybe have your inspiration to get your Valentine's Day cards made...it's closer than you think!
Thank you all again for visiting and don't forget to check out Paperberry Lane on Facebook and Pinterest for easier access to your bit of sweet creativity!
 RSS Feed

