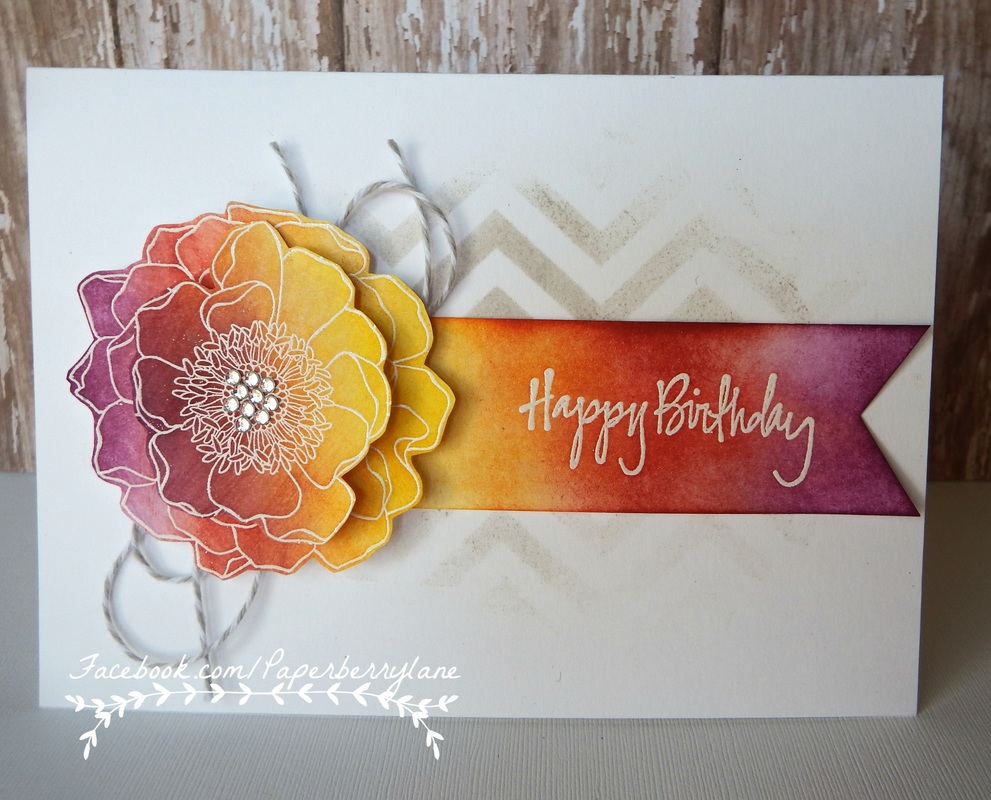
If you follow Paperberry Lane on Facebook, then you've probably seen the Sunset Birthday card I posted a couple of weeks ago. I've received so much positive feedback on this card that I decided to do a tutorial on it! It's super easy and only requires a few supplies. If you are into distress inks then you should already have the supplies on hand! So, what do you need to get started:
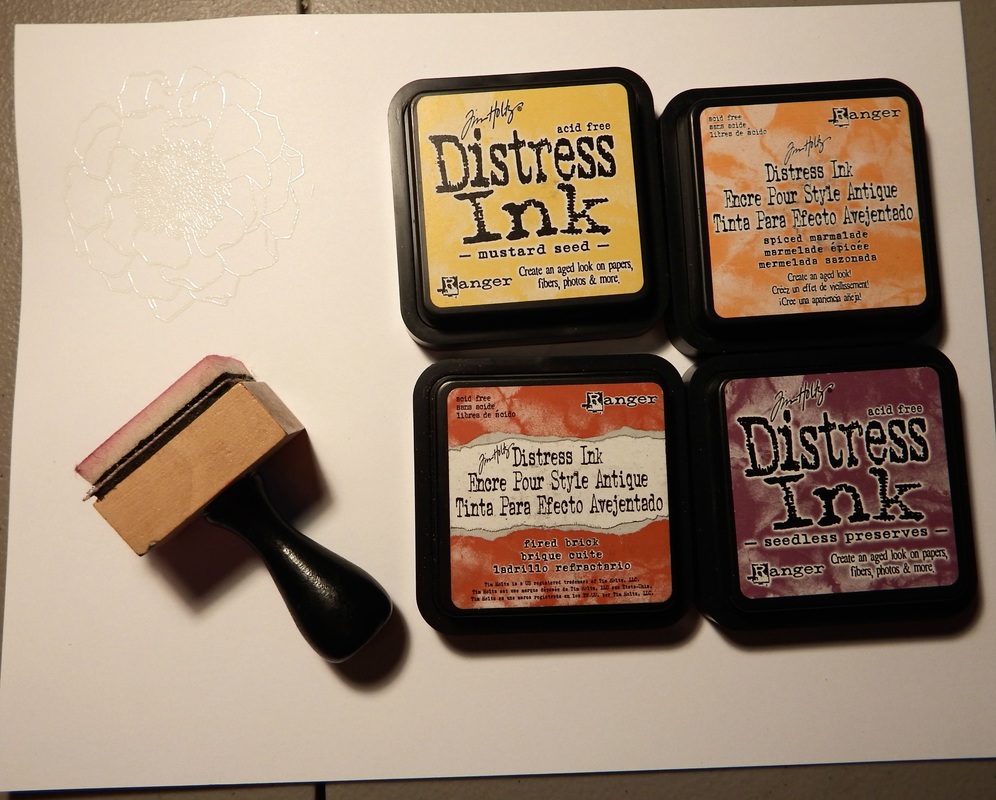
You will need:
1. White cardstock
2. Distress inks in your chosen colors. I'm using Mustard Seed, Spiced Marmalade, Fired Brick and Seedless Preserves.
3. Distress ink tool with foam pad.
4. Flower stamp of your choice. I used Blended Bloom from SU!
5. Versamark and embossing powder to create embossed image.
1. White cardstock
2. Distress inks in your chosen colors. I'm using Mustard Seed, Spiced Marmalade, Fired Brick and Seedless Preserves.
3. Distress ink tool with foam pad.
4. Flower stamp of your choice. I used Blended Bloom from SU!
5. Versamark and embossing powder to create embossed image.
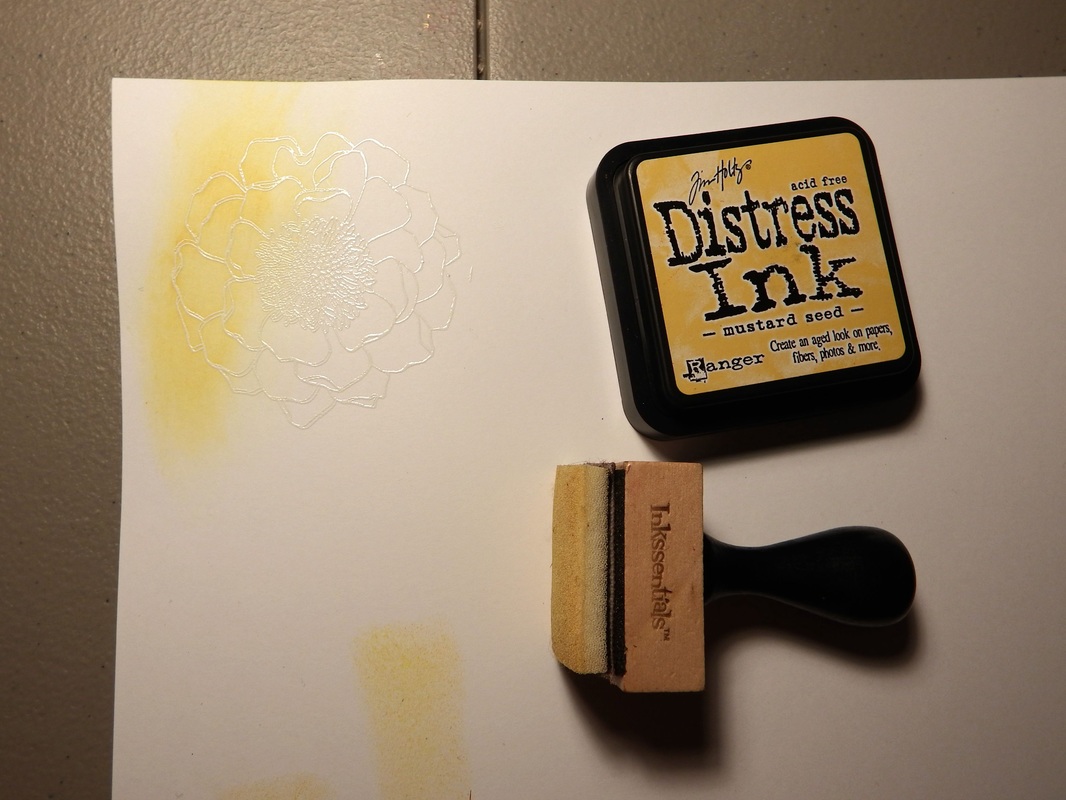
Get started by heat embossing the flower image of your choice in white.
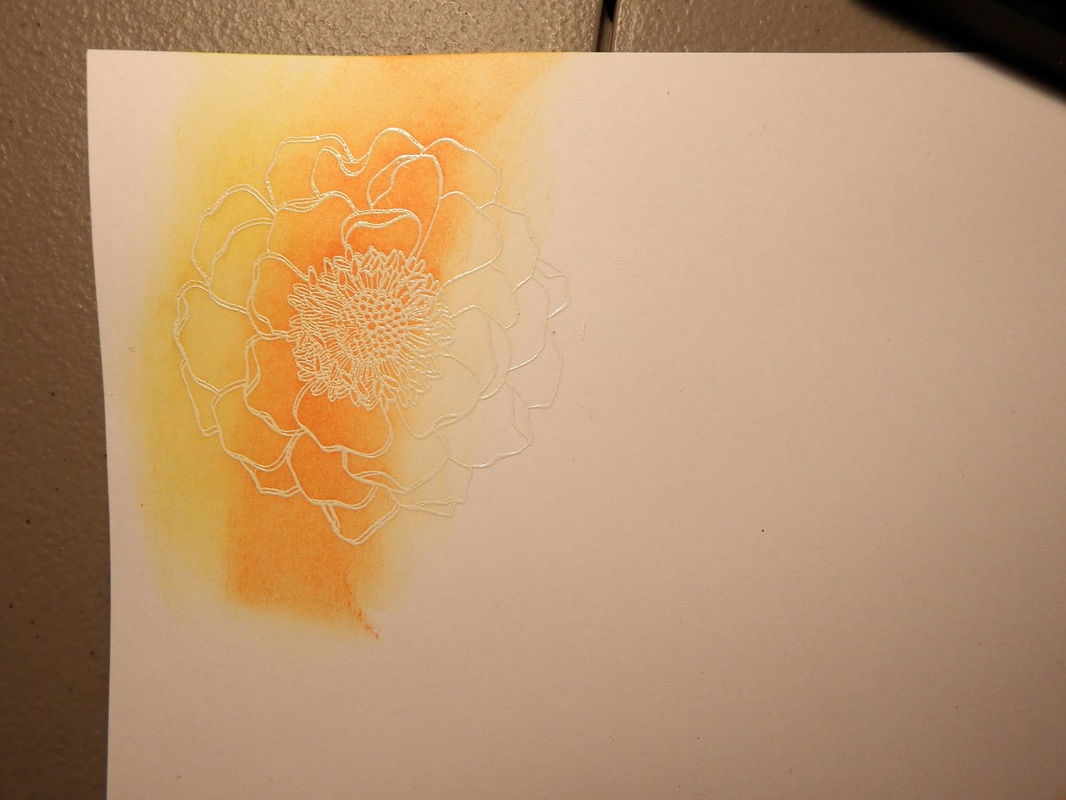
Next, starting with the lightest color, start to blend the color on one end of your flower, making sure that you leave enough room for all four colors. You may want to leave slightly less space for the darkest unless you wish to have a darker looking color. Personally I love the yellow and oranges at the start so I chose to give them just a bit more space.
Continue to blend in each color until you have come to the end of your flower. Your progress should look somewhat like the pictures below. Don't worry if you don't think it looks right, after you cut out your flower, it usually tends to make it look much better.
After the second color:

After your image is completely colored, I always take a baby wipe and lightly wipe the top. This will take any color off the embossed image and also give the colors a bit of pop. Just don't wipe too much or you will take color off of the cardstock, as distress ink is water activated.
To get the dimensional look of the flower, I simply made two of these flowers and the top one was cut out a bit smaller and layered with a foam dimensional dot. You could also do a third flower with mostly the middle for an even more dramatic effect.
To get the dimensional look of the flower, I simply made two of these flowers and the top one was cut out a bit smaller and layered with a foam dimensional dot. You could also do a third flower with mostly the middle for an even more dramatic effect.

You will repeat the same process for the embossed sentiment banner.
To get the chevron in the background of this card, I simply put down a chevron stencil and patted it with gray ink until I was happy. The string behind the flower is simply gray and white bakers twine.
You can also add some sparkle by adding rhinestones, pearls, Stickles, glitter or whatever makes you happy; to the center of your flower.
I hope this tutorial gets you making your own sunset-inspired card soon!
Don't forget to "Like" Paperberry Lane on Facebook to stay updated on all that happens on my Lane!
You can also follow me on Pinterest or shop my Etsy store!
Thanks for stopping by!
 RSS Feed

