I promised and here it is! I'm so excited to show you all how it's done! There are many ways to achieve shading in water coloring but this way I have found that works for me. Feel free to experiment and change it to make it work for you, too! And don't forget to post your finished pieces on the Paperberry Lane Facebook page!
This post is very picture heavy but don't let that intimidate you. I wanted to make sure what I am explaining is clear so you can do it as easily as I do...and you can! Give it a try!
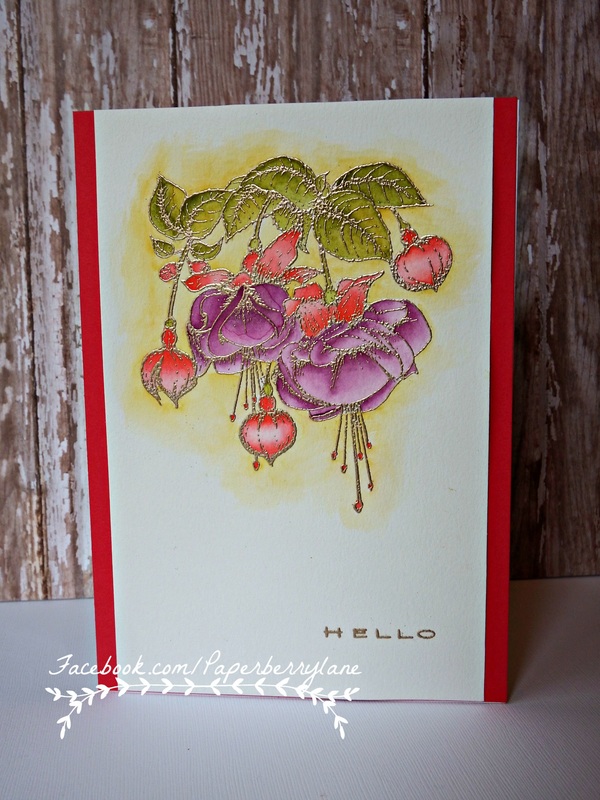
Here's the finished piece. You can create your own beautiful water colored piece...now let's get some supplies together and get this party started!
This post is very picture heavy but don't let that intimidate you. I wanted to make sure what I am explaining is clear so you can do it as easily as I do...and you can! Give it a try!
Here's the finished piece. You can create your own beautiful water colored piece...now let's get some supplies together and get this party started!
What you will need to create your own watercolored masterpiece:
1. Heat embossed image of your choice. Watercolor paper works best but you can also use cardstock. This image is called Fucshia Bouquet by Heartfelt Creations.
2. Water-based/dye inks of your choice.
3. Waterbrush
4. Acrylic block
1. Heat embossed image of your choice. Watercolor paper works best but you can also use cardstock. This image is called Fucshia Bouquet by Heartfelt Creations.
2. Water-based/dye inks of your choice.
3. Waterbrush
4. Acrylic block
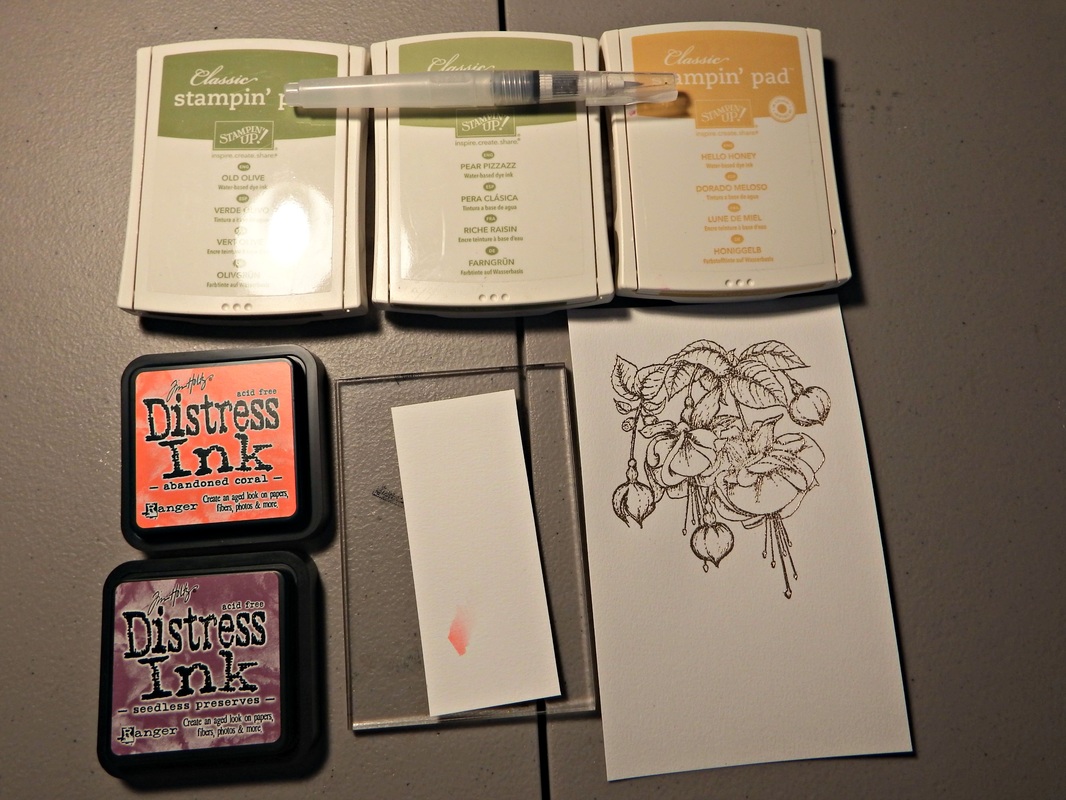
If you are trying to recreate this exact look, the colors I used are Stampin Up! Old Olive, Pear Pizazz, Hello Honey and Distress inks from Ranger: Abandoned Coral and Seedless Preserves. You will also need a decent size of scratch paper for blotting/wiping off your brush.
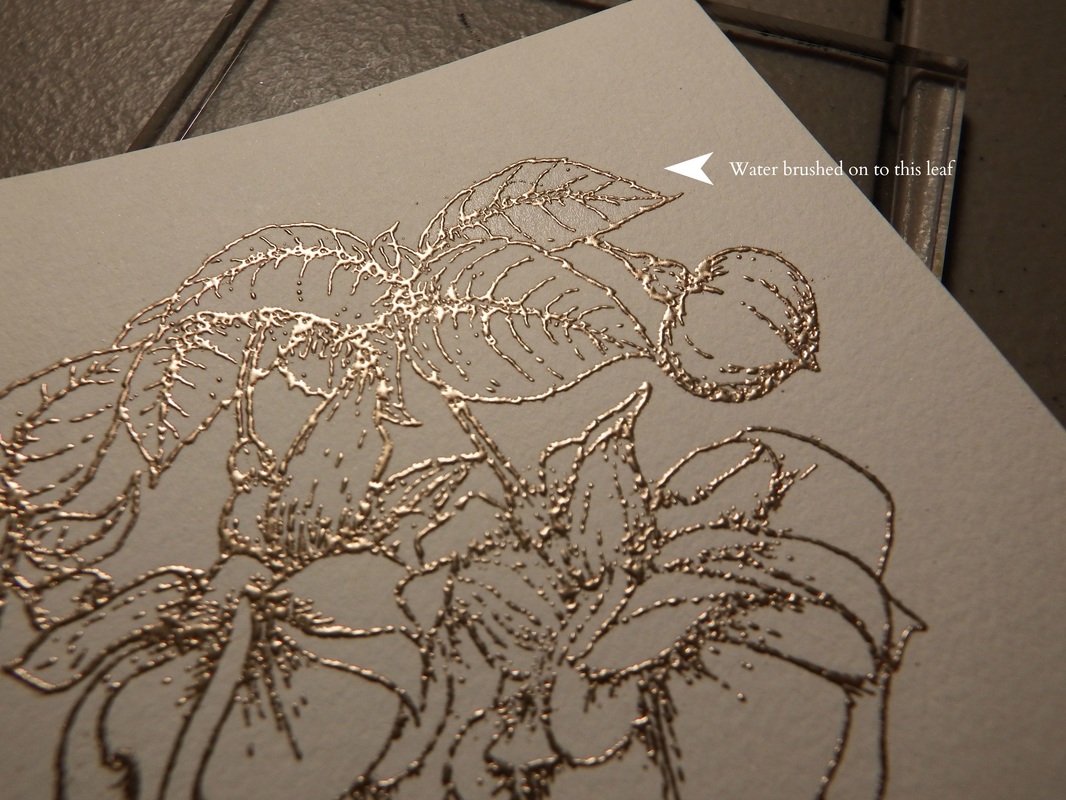
Begin by squeezing some water into the barrel of your water brush. When you wipe the brush on your arm, there should be enough that you can feel it, but it should evaporate quickly after. If you have too much, simply wipe it on your arm or a large piece of paper until you get it to where it's supposed to be.
Next, begin by wetting a small area that you plan to color first. Work in small areas, as the paper will soak up your water quickly. Your paper should look damp but you should not be able to see any puddling. Why wet the paper? Two reasons: First, it is easier to blend without ruining or tearing the paper and it will take on your paint easier if it has a bit of time to be damp. You will notice that a dry surface and one that has been dampened will give you two different looks. Both are nice, you decide which is best for your image.
Next, begin by wetting a small area that you plan to color first. Work in small areas, as the paper will soak up your water quickly. Your paper should look damp but you should not be able to see any puddling. Why wet the paper? Two reasons: First, it is easier to blend without ruining or tearing the paper and it will take on your paint easier if it has a bit of time to be damp. You will notice that a dry surface and one that has been dampened will give you two different looks. Both are nice, you decide which is best for your image.
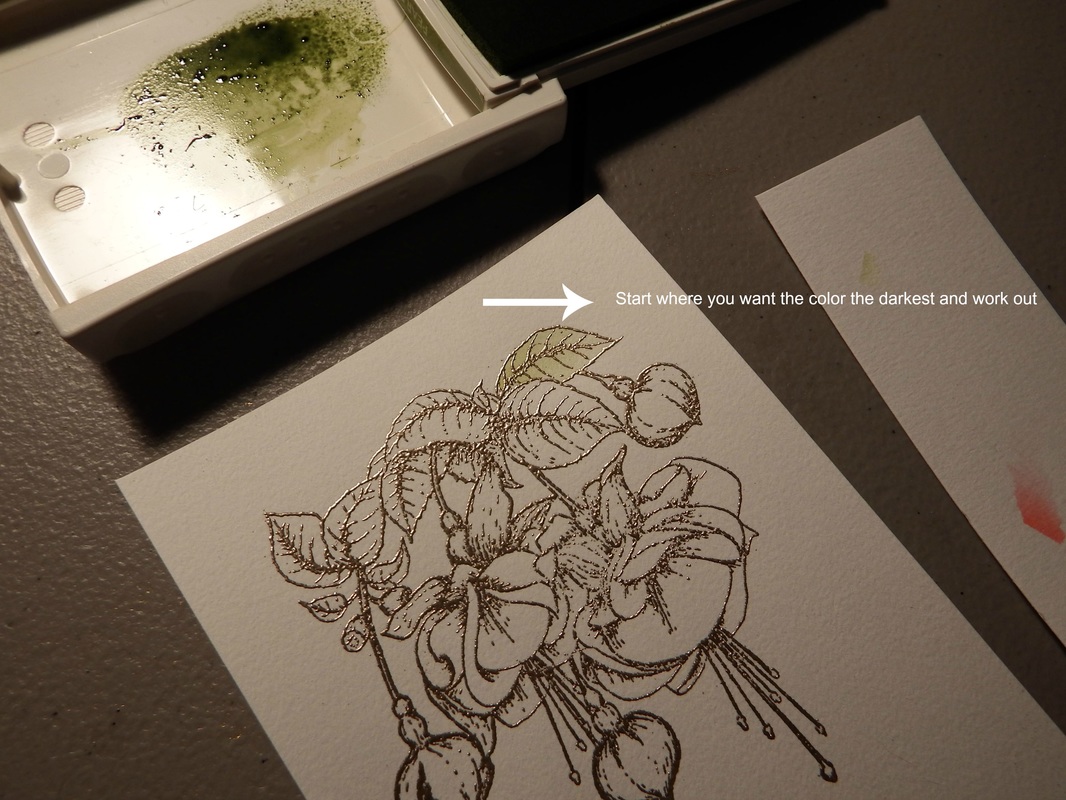
One of the nice features with the Stampin Up ink is that they can be used as a try for the ink when the lid is opened. After you have your ink chosen, apply a dab to your brush. If you've never used a water brush, test the pigment by brush it off on your scratch paper. This should give you a better idea of how it will look once you apply it. Start applying your color in the area that you will want the darkest. This is usually around creases, folds and shadowed areas.
For the first "layer", apply it and blend throughout. I like to apply my first layer very lightly. This will give your image a basecoat. You can always apply more, but it can be tricky and sometimes impossible to remove color.
To create the shading, I wanted my leaf darker towards the stem end so I kept applying more to that end. To get a darker shade, you may need to use an ink that is a shade or two darker, as you will see I did with mine.
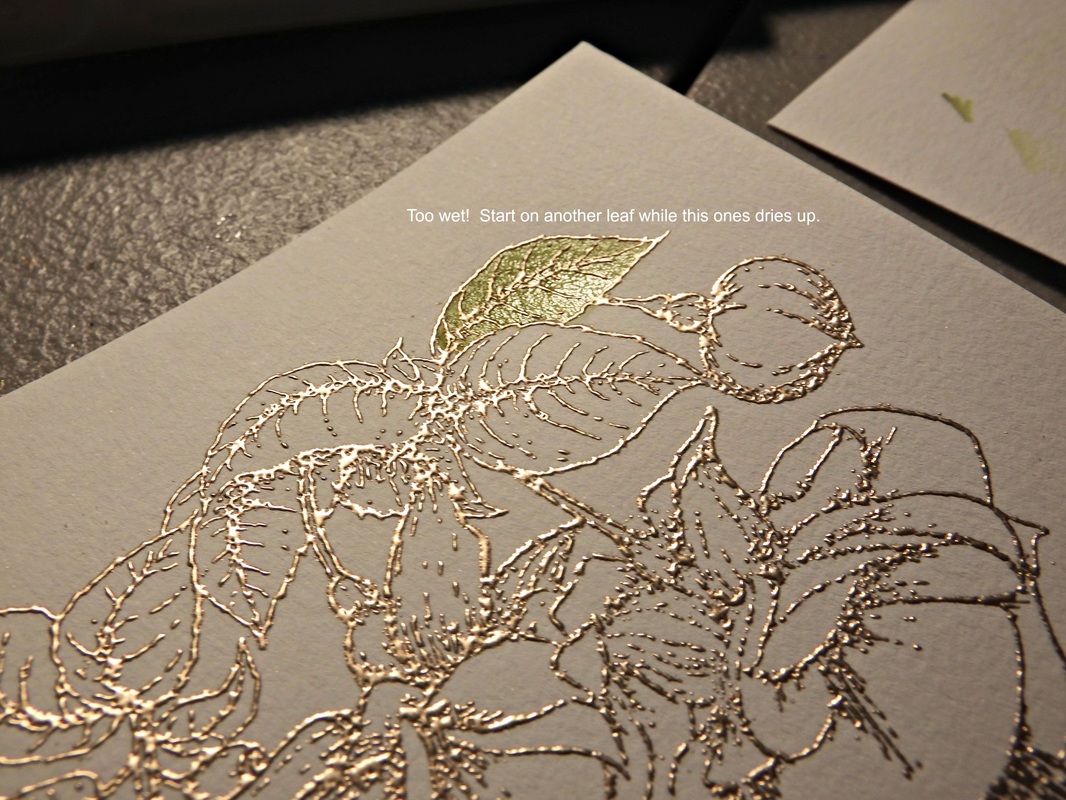
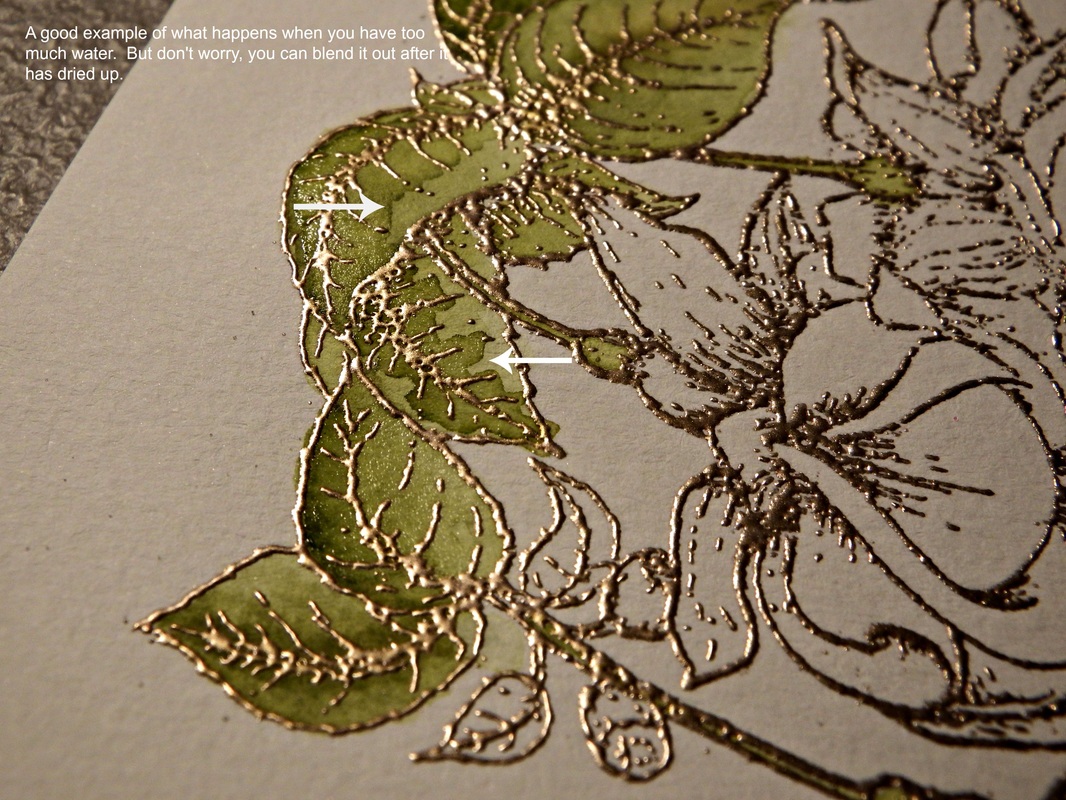
Getting darker! My leaf is over saturated so at this point, I will give it some time to dry and start on another leaf. If your image starts to look really shiny or puddling, let it sit and soak. Too much water will cause your color to run. While this is great for some images, it's not the look I'm going for right now so I'm going to let it dry a bit.
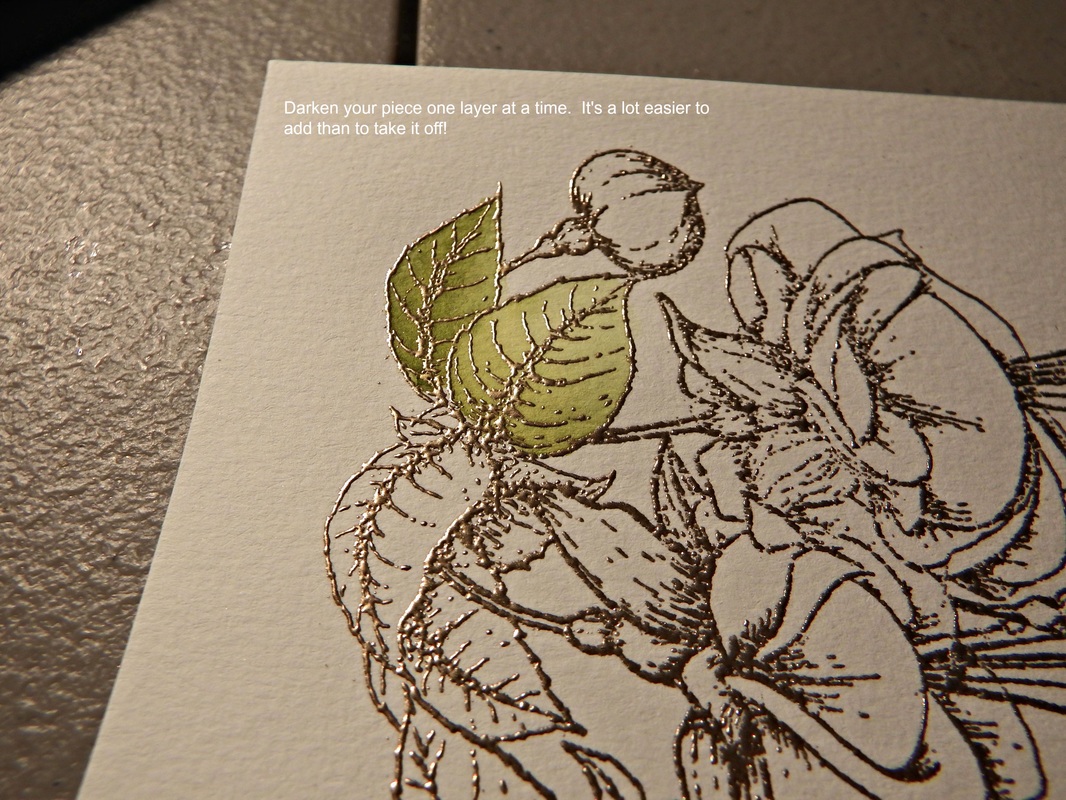
Just keep adding layers of color until you get something you are happy with. This isn't a quick coloring technique that can be done in five minutes but it is worth all of the work!
For this leaf, I wanted my shading along the middle crease and veins. I applied a line of color and blended it towards the edges, I repeated this until I was happy with the coloring. This is one that needed a darker ink so the shading was more pronounced. Don't forget to keep wiping/blotting your brush off between adding color and blending it in. This is probably the most important thing I can say!
Continue working all areas of your initial color this way. Don't worry if you over saturate certain areas. You can always go back when it's dry and blend out the harsh lines. Sometimes you may choose to keep them but for this look, I was going for a smooth, blended look. Just depends on your image.
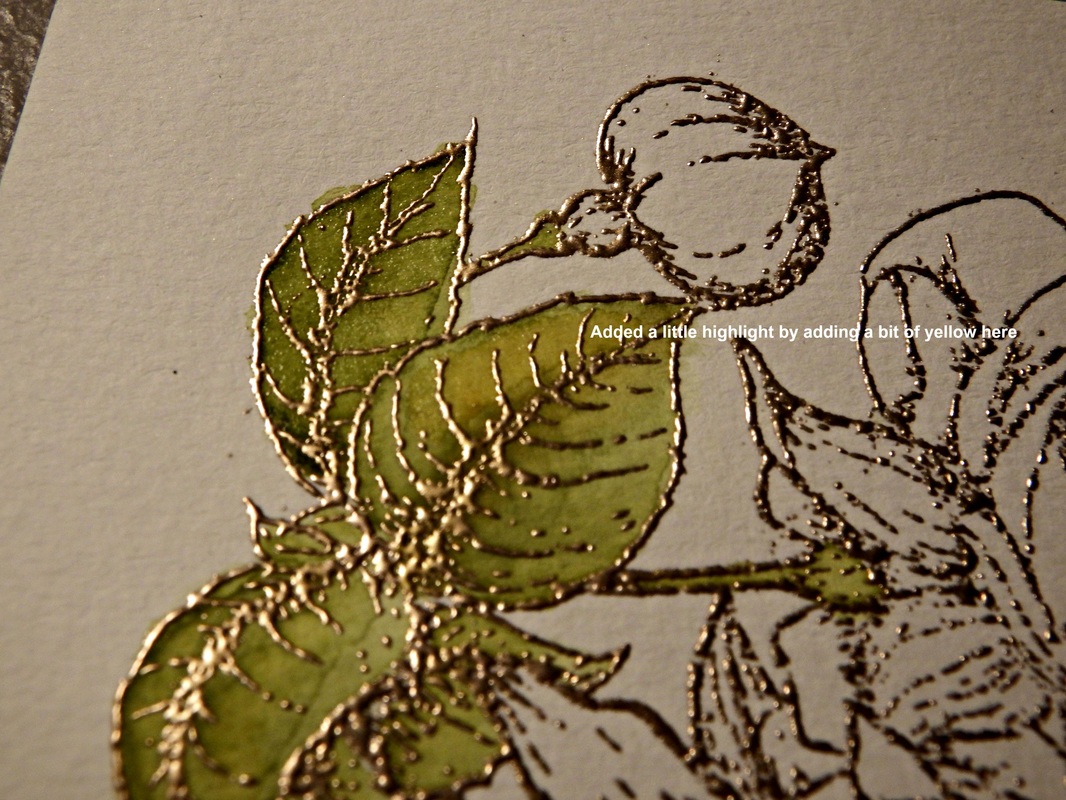
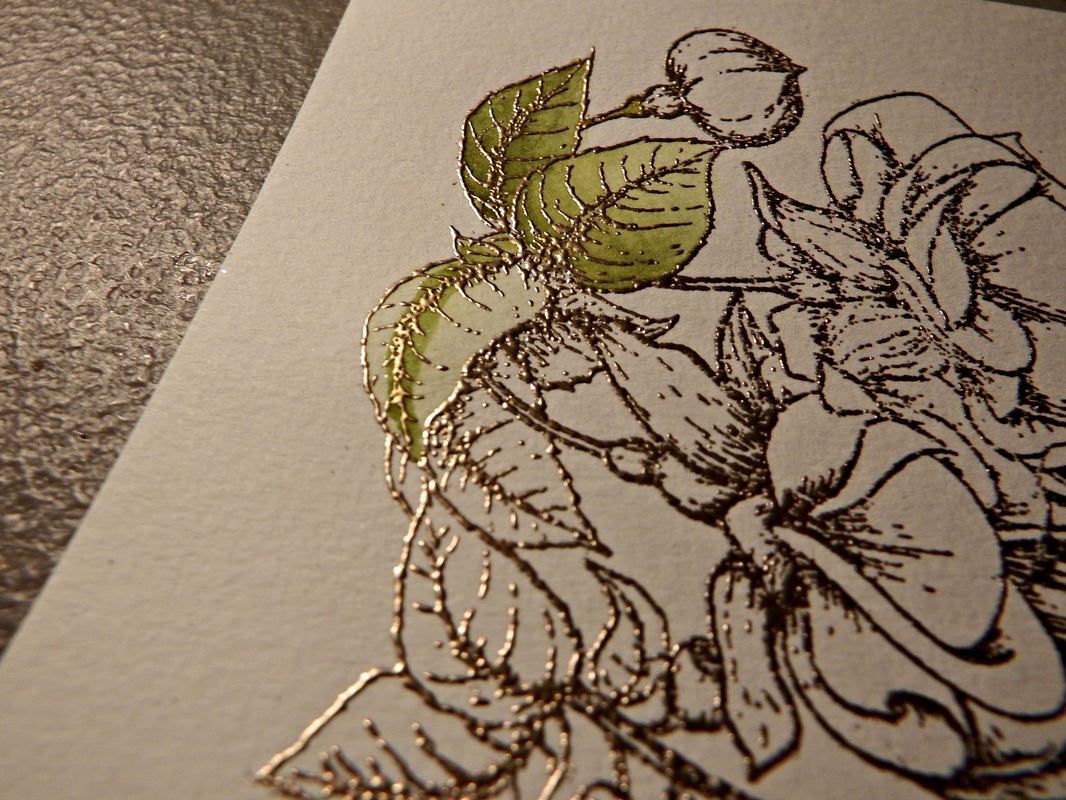
We've added shading but what about highlights? In this picture, I've added a bit of the yellow the the broad part of a few leaves just to give a bit more contrast. If you are unsure about adding something and possibly ruining it, try it out on your scratch paper before doing it on the final piece.
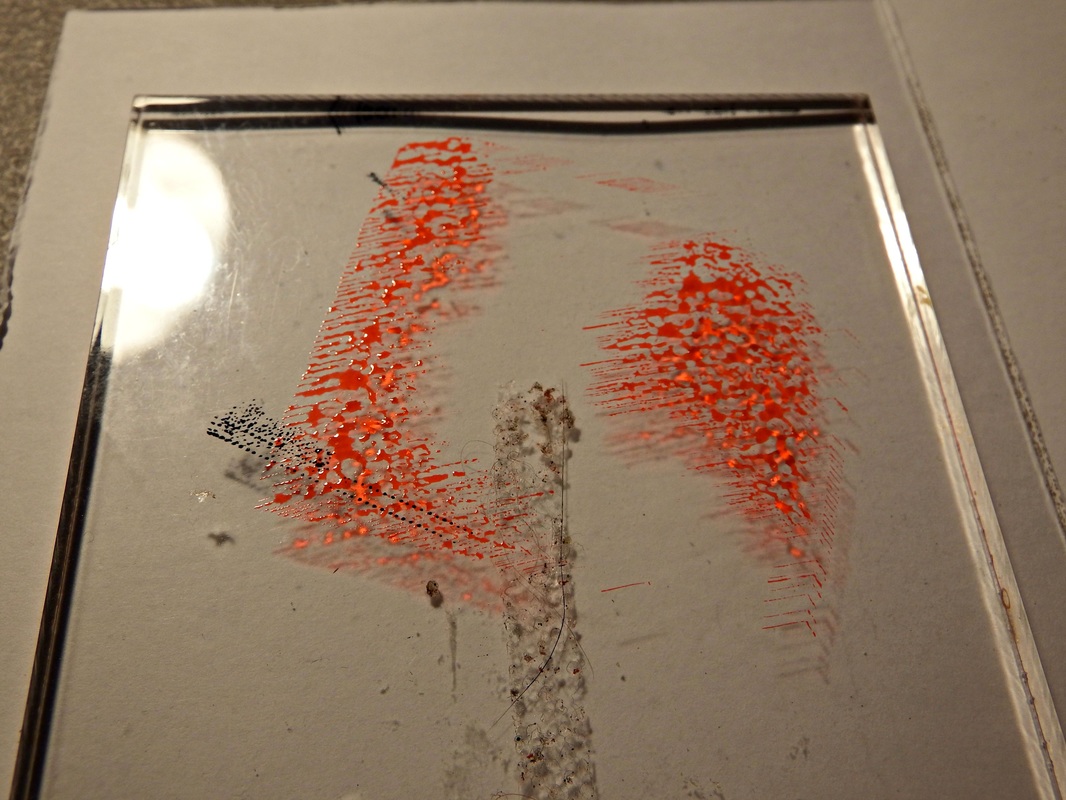
So, what do you do if your ink doesn't come with it's own tray? Well...that's what the acrylic block is for. Just pat your ink pad on a clean, dry acrylic block to use a palette. You don't need a lot, a little goes a long way, especially for dark or vibrant colors.
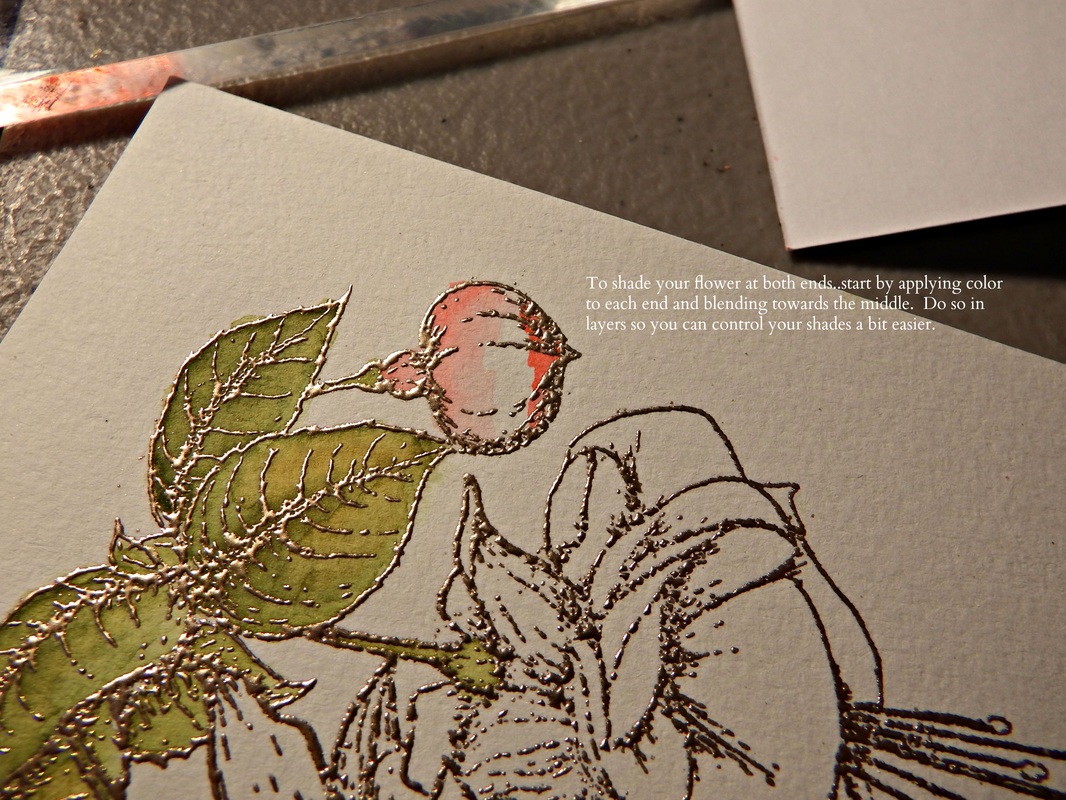
To color flowers, you will do much the same way as the leaves. For this bulb-shaped flower, I wanted a bit in the center to look lighter as a highlight. I achieved this by adding color to the top and bottoms, wiping off my brush and blending each end towards the opposite, being careful not to over color the middle. Easy peasy!
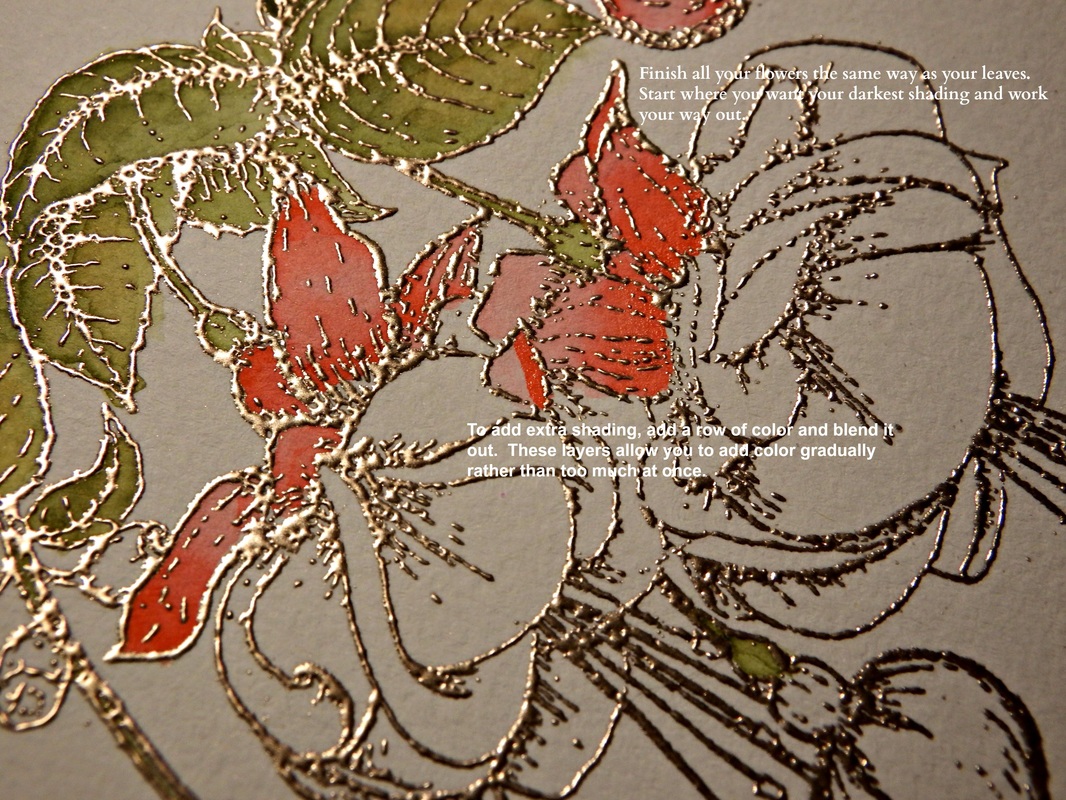
The rest of this image was done in the same way as the leaves. Add color to the areas you want the darkest, wipe off your brush completely and blend inward. Just continue to add your color in layers until you get the coloring/shading you want.
The best way to add a bunch of color is to get a decent amount of color on your brush and lightly brush on a thin line and blend it out.
The best way to add a bunch of color is to get a decent amount of color on your brush and lightly brush on a thin line and blend it out.
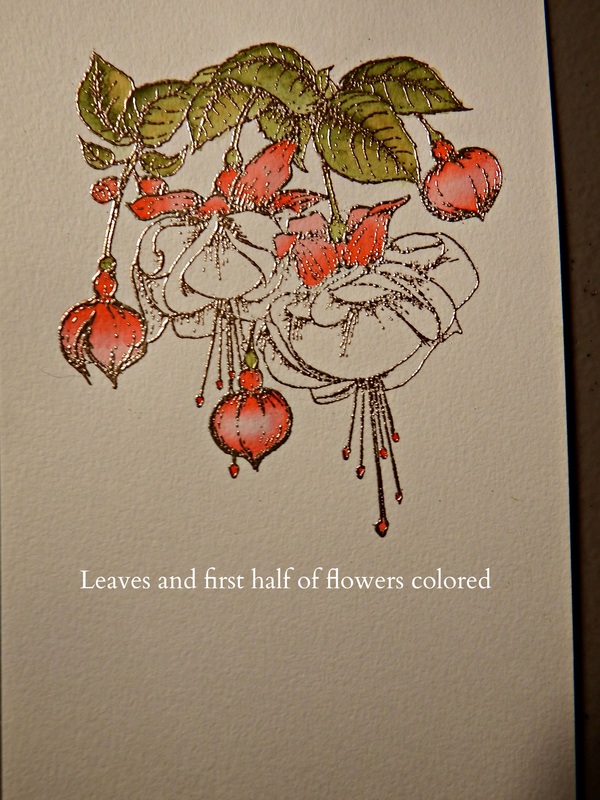
The first half of my flowers are colored. Also, to keep your flowers looking more realistic, play around with different areas of shading, not every flower or leaf looks exactly the same in nature and neither should yours.
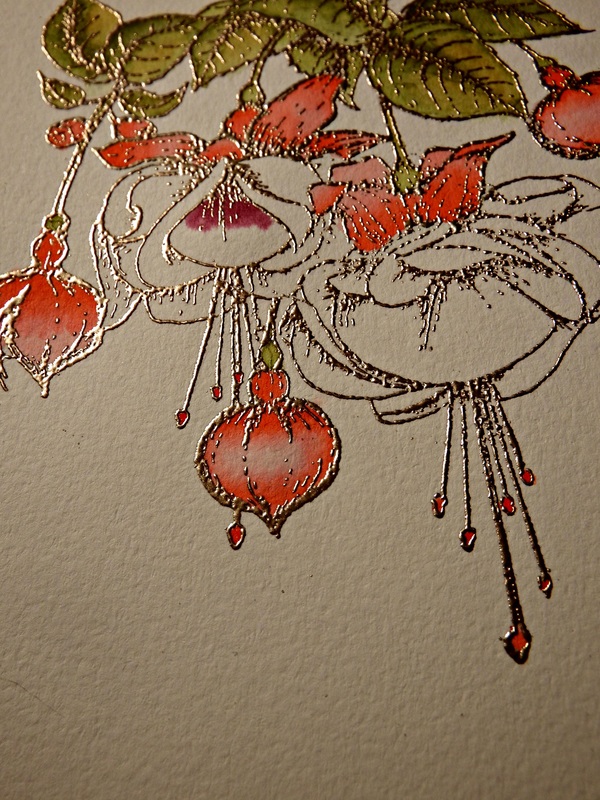
Another flower, same techniques....lighter layer first, adding more layers of color starting where you want the darkest first and blend outward. You're almost finished...just one last step...
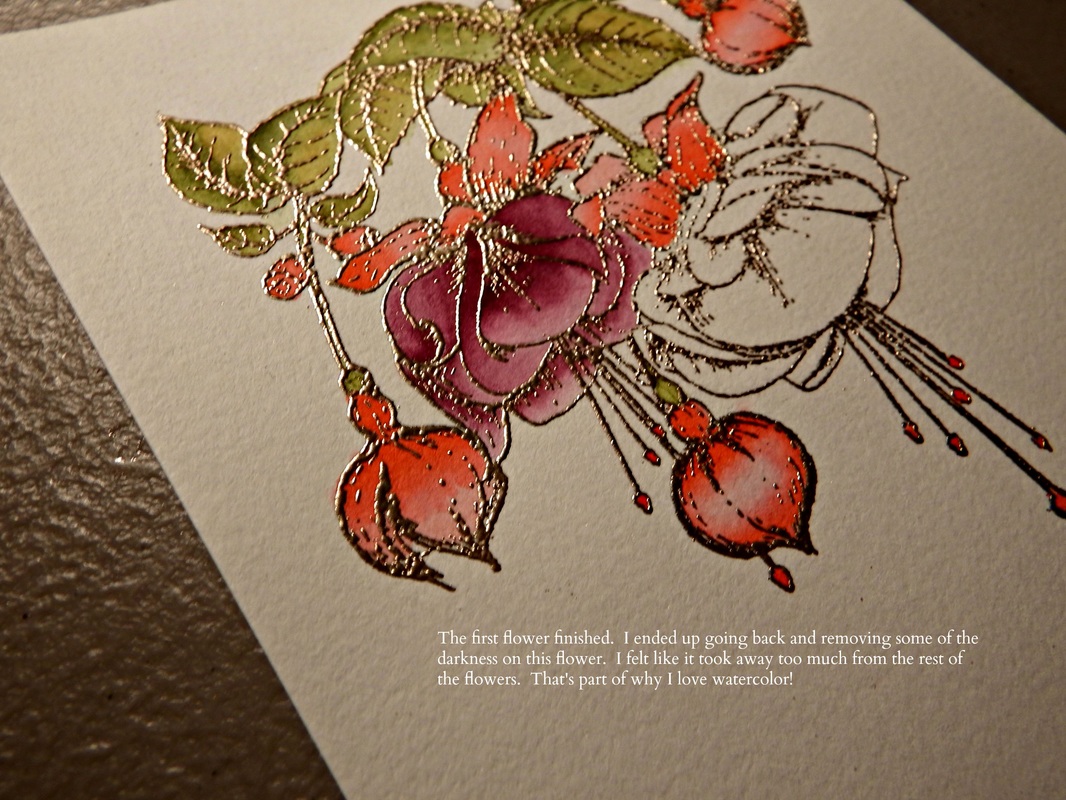
The first flower, finished. As a side note, I did go back and remove some of the color out of the middle of this flower. To do this you simply use your water brush (clean) and wipe at the areas you want to remove color. Depending on the type of ink, paper and how long it's been sitting, it will take off some of the color but not too much...that's why it's so important to put your color on in layers.
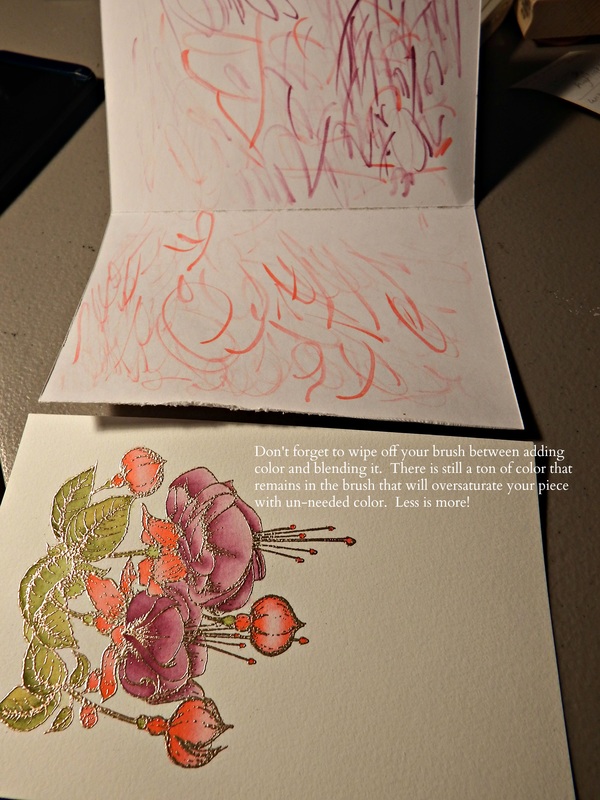
I'm not exaggerating when I say you need to wipe your brush off in between steps. This paper is full on both sides from cleaning the excess ink off.
Now that the image is totally colored, I usually go back and blend any spots that have a hard water line and add or remove ink from areas that I'm not happy with.
Now that the image is totally colored, I usually go back and blend any spots that have a hard water line and add or remove ink from areas that I'm not happy with.
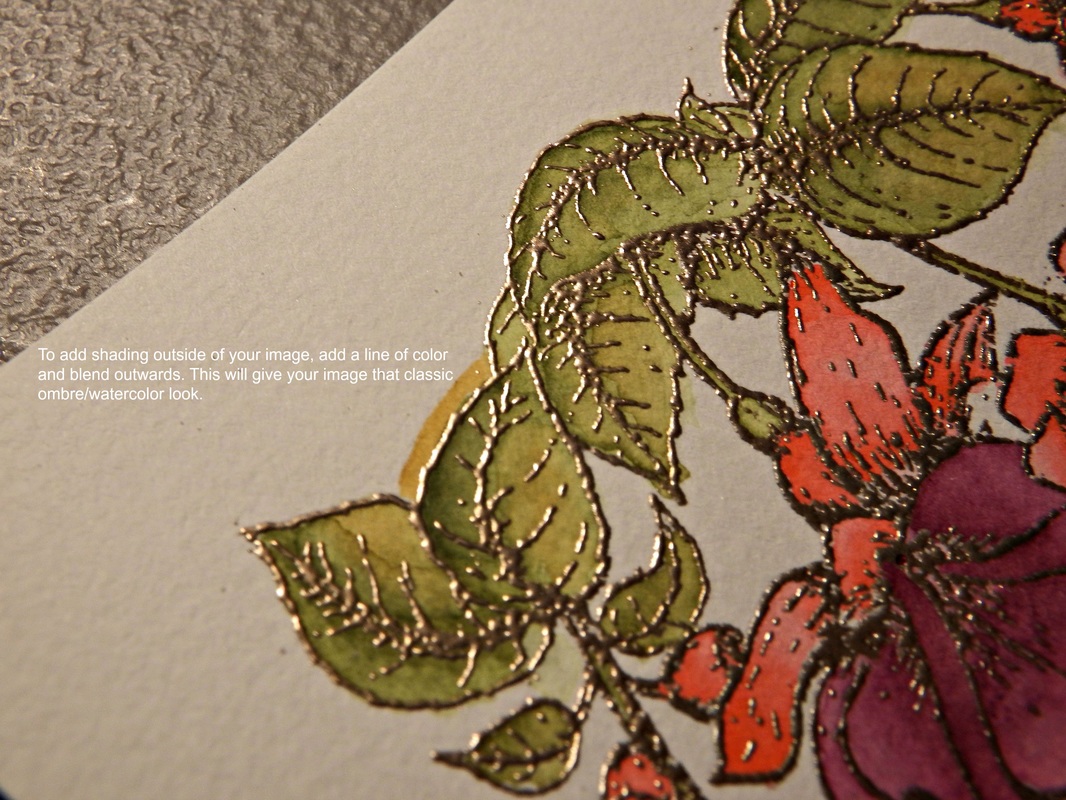
I usually give my images some sort of outline-type shading. This helps your image to stand out against the plain white background and if you pick your colors wisely, it will help the colors in your image stand out even more.
To get this look, load your water brush with the chosen color and brush a fine line along the outline, working in small areas. After you wipe the excess off, blend your color outward. This will create that ombre/watercolor effect. Just be sure not to go inside the lines because you will pick up other colors and blend them in as well.
To get this look, load your water brush with the chosen color and brush a fine line along the outline, working in small areas. After you wipe the excess off, blend your color outward. This will create that ombre/watercolor effect. Just be sure not to go inside the lines because you will pick up other colors and blend them in as well.
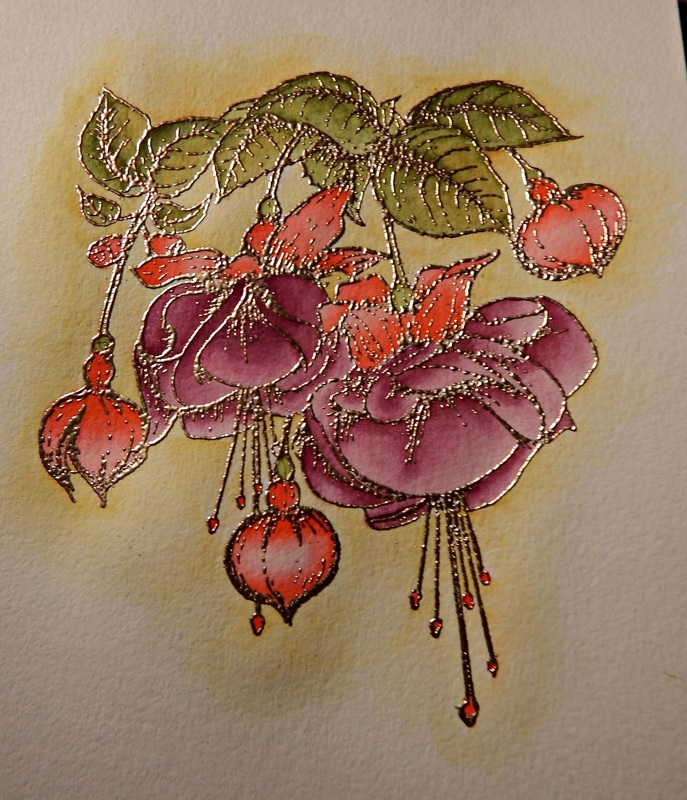
This is my finished image, now just have to emboss my sentiment and mount in on my card base.
Don't be intimidated by water coloring. It may take a bit of practice but now you are armed with technique!
Don't be intimidated by water coloring. It may take a bit of practice but now you are armed with technique!

This card doesn't need much else other than a small sentiment and a bit of background color. Your artwork should be the center of attention so you don't need to add much to make it shine!
Thanks for stopping by and making it all the way through this lengthy tutorial.
If you found this helpful, show some love by spreading the word and inviting others and liking Paperberry Lane on Facebook! Here you can get ideas at your fingertips and be alerted to new blogs and tutorials as they happen!
Thanks again for stopping by my lane!
 RSS Feed

